Showing posts sorted by relevance for query walnut. Sort by date Show all posts

Tuesday, September 29, 2015

Walnut sourdough bread & peanut butter ice cream

It was too hot much of last week to bake, but the weather was perfect for a no-cook, same-day ice cream like peanut butter. Toward the end of the week, I also made a walnut sourdough, which is becoming one of my favorite breads.

Walnut sourdough

I've made walnut sourdough before, both with and without the long covered baker. After my weird (though tasty) sourdough last week, I felt like I needed to go back to the original recipe and not mess with the timing so much.

Walnut sourdough, cooked in a long, covered baker

I used the usual Josey Baker recipe, but added walnuts (maybe 1 cup). I deliberately kept the dough a little drier than it has been. I think I've been putting > 1 cup of water in there, but I used a scant cup this time. The toasted walnuts also might have absorbed some water. This dough was much easier to handle than it has been lately.

Walnuts ready for toasting

The conveniently pre-chopped walnut pieces came from Trader Joe's. Previously I'd chopped whole walnuts from Berkeley Bowl, but the TJ pre-chopped nuts are much more convenient, and they tasted just as good to me (after toasting, at least). I just tossed a bunch onto a cookie sheet, put the sheet in the oven, and turned the oven to 350.

I mixed in the walnut pieces (maybe 3/4 cup?) during what would normally be the first mini-knead. The dough was easy to handle, so I sort of picked it up and mashed it around to distribute the nuts.

After the last mini-knead

The rest of the mini-kneads were the usual Josey Baker process of picking up the edge and stretching it gently, turning the bowl a tiny bit, repeat 10 times or so.

A couple of hours after the last mini-knead, the dough had risen quite a bit and was ready to shape.

Ready to shape

I really need to take a shaping class, but here's what I did this time. I put it out onto a well-floured board. After making sure the dough wouldn't stick (using a dough blade to scrape it up, putting flour underneath, and turning it over a couple of times) I patted it into a rectangle. I folded the rectangle into thirds and let it rest. After a few minutes, I folded the dough in half again and rolled it a little bit. I then put it into the gheed baker.

The shaped dough in the long, ghee-brushed baker

2.5 hours later, it looked ready to go into the oven.

After rising

Rats! I forgot to slash it! No matter, it didn't seem to mind.

I didn't notice when the oven reached 450, and the color from the walnuts made it difficult to tell how brown the crust was. About 30 minutes after the bread went into the cold oven, I took off the top of the baker. I took it out of the oven about 10 minutes later.

Partial remains of the loaf

We had to take it to a friend's house (40 minutes away by car) while it was still hot, making the car smell heavenly. We couldn't resist tearing off some to eat. When the loaf was merely warm, we put it into a lunch bag for ease of carrying.

Greasy paper bag, thanks to the walnuts

The bread worked well cut thick and used to hold thin turkey burgers. The next day it was great as a base for tuna sandwiches. And, of course, it was great alone.

Timing details:
  • Midnight or so Friday: refreshed the starter
  • 9 am Saturday: mixed the dough and toasted walnuts
  • 9:40: mixed in the walnut pieces
  • 10:15, 10:30, 10:50: mini-kneads
  • 1:45: started shaping
  • 2:05: put it into the ghee-brushed baker
  • 4:35: put it into the oven; turned the oven on to 450
  • 5:05: took the top of the pan off
  • 5:15: took the loaf out of the oven
Temperature details:
  • The water I added to the starter was 88 degrees, by probe or by laser (pronounced LAY-zerrrrr). (The recipe called for 80 degrees.)
  • The kitchen was 73 degrees when I started, 75 by the time the dough started resting at 9:10, and 79 by 2.

Peanut butter ice cream

Peanut butter ice cream is easy and quick to make, following the recipe in The Perfect Scoop. I had a request to make peanut butter chocolate, so I mixed chocolate chunks into most of the batch. I love PBJ ice cream, so I made a bit of that, too. Sadly, I had no Bonne Maman, so I settled for another brand of raspberry preserves. Both the PBC and the PBJ were very good, especially the first day before the ice cream hardened.

Sorry, no pictures.


Sunday, March 20, 2016

Cranberry-walnut sourdough is delicious (and other lessons learned)

I've been making lots of sourdough lately. My favorite had dried cranberries and toasted walnuts.

Cranberry walnut sourdough #2

Rather than dwelling on individual loaves, this post summarizes what's worked and what hasn't lately. As usual, the sourdough is based on Josey Baker's recipes.

How much fruit & nuts?

When I make a loaf that's just walnuts, I usually use 1 cup (or more) of toasted walnuts. When the loaf is fruit and nuts, I use 3/4 cup of toasted nuts and 1/2 cup of dried fruit.

To soak or not to soak?

If you have great dried fruit, I don't think you need to soak it. If you do soak, 20 minutes in hot water seems sufficient, but be sure to drain the fruit really well.

I didn't soak the cranberries the first time I made cranberry-walnut bread, and the bread was still delicious. A big part of their deliciousness was that the cranberries were great. I think I got them at Berkeley Bowl.

Interior of cranberry-walnut loaf #1


The second time I made cranberry-walnut bread, I used cranberries from Trader Joe's. They were fine but not great, so I didn't love the bread quite as much. I soaked them and should have drained them for longer, but the end result was still a very nice bread. You can see from the pictures that the cranberries in loaf #1 were larger and more deeply colored. They just had a lot more flavor than those in loaf #2.

Interior of cranberry-walnut loaf #2

In a raisin-pecan loaf that I made, I soaked and drained the raisins, both for longer than I did the cranberries. That worked out well, but I don't think you need to soak the fruit for that long.

When to add the fruit & nuts

I used to add walnuts just after mixing in the flour. That's probably the easiest way to go, but the dough is discolored by the walnuts: near the walnuts, the dough is purplish, as you can see in my other posts about walnut sourdoughs.

Another option I tried is adding the walnuts and fruit during shaping. This worked OK, but the distribution wasn't very good, and you have no possibility of reshaping if you mess it up.

Take my raisin-pecan sourdough. I spread its dough out flat, then spread out the soaked raisins and toasted pecans, and then rolled it all up. But the dough had no surface tension, so I ended up folding it into thirds to make it a little more likely rise and get a nice ear. 

Raisin-pecan sourdough

As you can see from the picture above, the shape is a little odd, but I did get that ear. Unfortunately, it was along one of the seams (at the top of the picture), not where I diagonally scored the bread. Also, raisins peeked out of the scores. Not a good look.

Inside the raisin-pecan sourdough

The distribution of raisins and nuts was uneven, but not as bad as I feared.

With both cranberry-walnut sourdoughs, I mixed in the fruit and nuts after my last fold-and-stretch knead. This wasn't as hard as I feared.

The winner: cranberry-walnut sourdough #1

The loaf had no ear (my boules never do), but the bread was delicious, with the mixins well distributed throughout.

Delayed baking and flying roofs

I often don't bake the bread the same day that I start it. Instead, I let it rise in the refrigerator, so I can bake it when I need it, and the bread can gain depth of flavor. In my house, we like sourdough.

For my last couple of batches, I created enough dough for two loaves. One loaf I shape immediately (to either bake right away or put in the fridge for a day or two), and the other I put in the fridge, unshaped. The next day I'll shape the second loaf.

I recently was having lots of flying roofs—the top crust would separate from the bread below it. The cause seemed to be taking the shaped loaf out of the fridge before I was ready to put it in the oven. Once I changed to baking cold dough, right out of the fridge, the flying roofs went away.

Sesame sourdough looked good on the outside

The sesame sourdough was my most recent victim of a flying roof.

Flying roof (not as bad as some I've had)

Baking pans & form factor

For boules, I use either the bare cooking stone with a large, squat stock pot on top or (more recently) a huge dutch oven.

Large, squat stock pot

The dutch oven is a little scarier, but it worked out really well when I somehow used a cloth to maneuver the dough into it, as opposed to when I used a parchment paper sling. (The parchment paper made the loaf's edges wavy and was hard to remove, since it got brittle.) I need to try the dutch oven again.

Huge dutch oven

For longer loaves, I used to use the same stone + stock pot combo as for a boule, but sometimes I'd misposition the pot, and the edge of the loaf would be a little weirdly shaped. Last time, I used my long, low, 5-quart Le Creuset pan. I was afraid it wasn't tall enough, but it worked out great.

5 quart Le Creuset worked great for a longer loaf

For really long loaves, I use the King Arthur covered baker. It's a handy form factor, but the crust isn't as nice. I baked my most recent plain sourdough in the covered baker, so it'd be easier to share with my parents.

Just before going into the oven.
This dough was a bit wet and overproofed;
slashing did not go well.

The crust looks nice, but I don't like it as much

Inside the end piece


Monday, August 17, 2015

Walnut sourdough and maple oatmeal bread

It was too hot last weekend to use the oven, so although I prepped a loaf of walnut sourdough on Friday, we didn't bake it until Monday morning.

Walnut sourdough

By Sunday morning, I was dying for some bread, so I decided to make some in the bread machine. I picked Hensperger's maple oatmeal recipe (p. 436), which has buttermilk (which we happened to have), maple syrup, butter, and rolled oats.

Maple oatmeal bread

This was some great smelling bread! It cooked on the dark setting, so it had quite a crust on it.

Inside maple oatmeal bread

I like this bread. It was tasty by itself just after baking, and fantastic toasted with cheese and tomatoes the next day. It doesn't have as much whole grain as I'd like, but the oats (although undetectable) make it less guilt inducing.

The walnut sourdough was my husband's great idea. I used quite a lot of walnuts, but unfortunately I can't find my notes about the exact amount (5 oz?). They came from a bag of chopped (though fairly big) walnuts from a brand I can't remember (and haven't seen before, as far as I remember); they seemed to be pretty high quality. I didn't bother toasting or chopping the nuts. Instead I used them as-is, straight from the package.

Shaped and ready to refrigerate

I made the sourdough following the usual Josey Baker recipe on Friday, adding the walnuts at the third it's-not-kneading session. The weather was warm, so I felt free to actually knead the dough a bit to get the nuts distributed.

Just out of the refrigerator

Monday morning the weather had cooled enough that using the oven was thinkable, so we finally baked the bread that day. It had puffed up quite a bit, and I was worried it had overextended itself, but it turned out fine.

Deflating after leaving the refrigerator

I had a bit of a hard time getting the dough out of the basket, but finally managed to do so without whacking it.


Finally out of the basket

I did the usual bake (remembering to remove the baking pan this time), with good results.

After baking

I never seem to get an ear on the loaf. I wonder if it's the recipe, the sourdough starter, the cut, or the fact that I halve the salt. Or all of the above.

In a sandwich

This is a very tasty bread, especially an hour or two after cooking, when the crust is still crunchy. The walnuts turn the bread funny purplish colors, but they add so much flavor I don't mind. We've eaten this plain, in a salami sandwich, with butter and marmalade, and with cheese and tomatoes. I'm not sure about the salami sandwich, but it was delicious every other way.

Monday, October 5, 2015

Walnut sourdough, toasted sesame bread, and sourdough waffles

Toasted sesame bread (with white whole wheat)

This week I made three things that I've made before:
  • Walnut sourdough bread (for a potluck)
  • Toasted sesame bread (this time with white whole wheat)
  • Sourdough waffles (this time with a better buttermilk)
Everything turned out fine, and people enjoyed the results. A few notes:
  • Don't overtoast the walnuts. The walnut sourdough bread was very good, but not quite as delicious as it has been in the past, and I suspect that the very toasted walnuts were to blame.
  • My husband baked the sourdough for me. Here are my baking instructions for the long covered baker.
  • The white whole wheat flour (from TJ's) had been in a plastic bag for a while, and it smelled a little stale to me. This wasn't noticeable in the final product.
  • The buttermilk for the waffles was a Canadian brand from the Alameda Marketplace grocery. It cost a lot more than regular buttermilk, but it seemed worth the price.
  • I might want to try half whole-wheat for the waffles next time.
While I was at the Marketplace, I bought some old varieties of wheat flour that I'm eager to try:
  • Sprouted khorasan wheat (One Degree's version of don't-call-it-Kamut)
  • Spelt (also from One Degree; I don't recall if it's sprouted)
The khorasan flour came from Dwayne Woolhouse's farm in Saskatchewan.


Sunday, October 18, 2015

Baguettes, penuche, walnut sourdough, and rice medley

A couple of weeks ago I made baguettes (with lots of help from my husband) and cinnamon bread (using whole-wheat sourdough and penuche). In the past week I also made walnut sourdough and whole-grain daily bread, using TJ's rice medley as the grain.

Cinnamon bread: whole-wheat sourdough with a penuche filling

Baguettes

I made a recipe similar to what I've done before, starting rather late in the day because I was giving the sourdough starter maximum time to make something of itself. 

I used the dough setting of the Zo to make the dough, removing it shortly after the first knead stopped. I then put it into an oiled 2-gallon measuring cup and left it, covered with plastic wrap, in the kitchen for an hour or more. Then into the fridge it went.

The next morning it was huge, sticking to the plastic wrap. I mostly unstuck it, pushed it down, and put it back into the fridge.

I'd sent email to my guys, asking them to shape and bake the baguettes, and providing thorough instructions. Here's a copy of the text. I was a little nervous because they'd never shaped baguettes before, but I shouldn't have worried. My husband did a great job! He made three baguettes:
  1. Just sesame seeds (no wash or water?)
  2. Plain, with picture-perfect slashes
  3. Egg yolk wash, sesame seeds, pumpkin seeds, and sunflower seeds

The resulting breads were all tasty and crusty, if a bit lightweight. Nonetheless, we'd make them all again.

A couple of notes:
  • I should've pushed down the dough before putting it into the fridge.
  • It survived anyway.

Cinnamon bread

This stuff is delicious. I made it twice, trying to iron out the kinks. I'll be making it again, but this time we'll try to save some of it to (1) avoid gaining weight and (2) freeze for toast and perhaps for bread pudding. 

I'd made the whole wheat sourdough recipe that's the basis of this bread before (Hensperger p. 280), and didn't like it much. But when you add penuche—brown sugar, butter, cinnamon, and (for this recipe, at least) nuts & vanilla—it's so good. The penuche instructions are on p. 281.

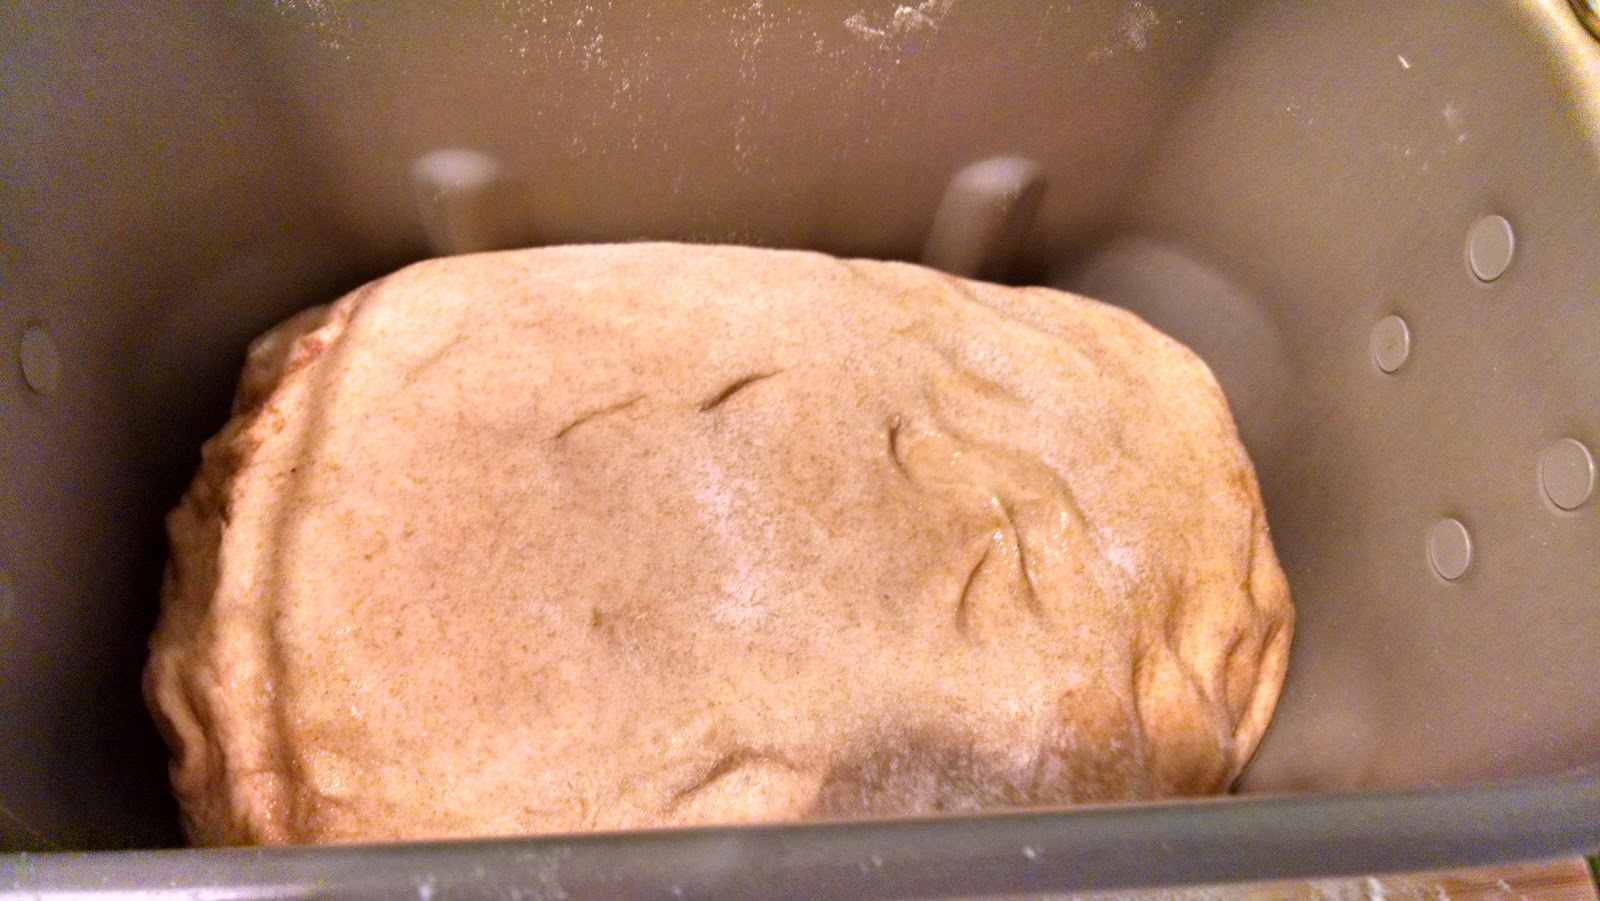
First I created the dough in the bread machine. Then I took it out, flattened it, and spread butter on it.


Dough with butter on top

The starter, and thus the dough, was too dry for this recipe, so I couldn't spread out the dough very well. As a result, the penuche mixture was perhaps half an inch thick. (I wasn't about to waste any of it!)

Thick penuche layer

I managed to roll it up.

After rolling

I took out the mixing blades from the bread machine's dough pan, and put the dough back in there to cook.

Shaped loaf ready to bake

The finished loaf looked and tasted very good, but it would've been nice to have less bread between the bits of penuche.

The inside of the baked loaf

So I tried again, a day or two later. The second loaf was misshapen, thanks to me adding the liquid too late for it to really get incorporated.

The ugliest part of the second loaf

Still, adding the liquid allowed me to make the dough thinner, enabling a wider dispersion of the penuche.

Inside the second loaf

Notes for next time:
  • I was confused by Hensperger's instruction to check the dough's consistency during the second kneading. I thought it meant during the start of the 2nd rise cycle, but that's not a kneading, just punching down. Next time, I'll check the consistency when the raisin beeper goes off.
  • I watered down the starter of the second loaf, but it was still too thick. Next time, water it down a little more, perhaps using milk instead of water.
  • The first time I used liquid vanilla, which you're supposed to mix with the butter. It never really mixed. The second time I used powdered vanilla, which was much easier to work with.

And the rest

The walnut sourdough was very good, as usual.

The whole-grain daily bread (from a Hensperger recipe I'd made before, p. 181) was good, but a bit too light for our taste. I also didn't like the occasional hard grains that were in TJ's rice medley, although I love them when I'm eating the rice plain. My husband made a grilled tomato-cheese sandwich with this bread, and it was OMG good, in a "you'll have a heart attack by 60" way.

Tuesday, January 20, 2015

Hunting for a good raisin bread

Although I'm not fond of raisins on their own, I love a good raisin bread. I've tried three recipes lately, with varying degrees of success. (Please tell me if you know a great bread machine raisin bread recipe! I still haven't found the perfect one.)

Here are the results of my raisin bread hunt, in order of how likely I am to make them again (which is the reverse of the order I made them in):
  1. C.R.O.W.W. (Cinnamon Raisin Oatmeal Walnut Whole wheat), from Beth Hensperger's ever-reliable The Bread Lover's Bread Machine Cookbook: Delicious, although I could've used more raisins and nuts (1/2 cup + 1/4 cup, to 3 cups flour). Besides the usual ingredients and those listed in the title, this recipe also uses egg whites, buttermilk, oil, and a vanilla powder that I couldn't find in local stores, so I bought it online. For the raisins I used "jumbo mixed medley" raisins from Berkeley Bowl's bulk section.
  2. 100% whole wheat fruit bread, from the Zojirushi cookbook: Also delicious, and kept fresh for days. Instead of raisins, I used dried sour cherries from Berkeley Bowl. Yum. I might've liked to have more fruit (it had 2/3 cup, to 5 cups flour) and maybe nuts. I might try changing the butter to hazelnut or walnut oil. Instead of cinnamon, this recipe used allspice, which tasted great with the cherries. Every recipe I've tried from the whole grain section of this cookbook has been really good. (The party bread is another story, but that came from another section.)
  3. Raisin, cinnamon, and nut wheat bread (aka fail bread) from Beatrice Ojakangas' Whole Grain Breads by Machine or Hand: Such a tasty failure, I had to make it twice to believe it. Both times, almost all the fruit and nuts (3/4 cup of each, to 4 cups flour) ended up at the bottom of the pan. I don't know if this was because there was too much fruit/nuts, or because the consistency of the dough was too thick or thin. Whatever the cause, this recipe must not have been tested with a Zojirushi—or maybe with any bread machine. Also, this bread went stale quickly. I'll think twice before making another recipe from this book.
The C.R.O.W.W. bread was my dinner the day I made it, and breakfast the next day. I should perhaps lay off, but at least it was a reasonably nutritious substitute for a real meal. I made the 1.5-pound loaf, changing the salt to a scant teaspoon, and yeast to 2 teaspoons.

C.R.O.W.W.: Dinner and breakfast in a loaf

The Zo bread was their typical, gargantuan size. It was supposed to use 100% whole wheat flour, but I ran out and used about 1/3 bread flour. (I reduced the gluten from 4T to 3T to compensate.) I reduced the salt to 1 teaspoon, and the yeast to a heaping teaspoon.

Zojirushi ~67% whole wheat fruit bread

Finally, we come to the fail bread. Take a look at it.

The bottom of the fail bread

Spectacular, isn't it? I think that's my second version, which had cranberries and walnuts. My first try had jumbo raisins and pecans, I think. Both tasted good, if you ignored the fact that the only fruit was on the bottom. (Some of the smaller nut pieces made it into the dough.) I didn't record my alterations the first time, but the second time I made the large-loaf size, reducing the salt to 3/4 t and the yeast to 1 t.

Because you just can't eat enough gluten, I've also started working my way through Josey Baker's bread book, which I've borrowed from the library. I'll blog about that next.

Saturday, February 14, 2015

Last weekend's bread

Last weekend, facing the loss of the Reinhart and Josey Baker books, I reacted in a few ways:
  • Making another recipe from JB (dark mountain rye, definitely not one I'd make again)
  • Ordering the JB book, which is worth the price even if the sesame seed bread recipe is the only great one (although I suspect it has more gems)
  • Converting Andrew's starter from a Reinhart starter into a Josey Baker starter (into two batches of starter, actually—one to be stored at room temperature and one to be refrigerated, to see which I prefer)
I also fed Lee's starter and made a Hensperger recipe to provide bread for the weekend, since the JB bread wouldn't be ready to eat until Monday. (Although the pre-baking time is less than for many of JB's recipes, you're supposed to wait 24 hours before eating the baked bread.)

Feeding Lee's starter turned out to be more of a process than I expected. I started late Friday night by mixing the starter with 1 cup each flour & water. After letting it sit overnight it still didn't seem to be very active, so I added a heaping tablespoon of plain yogurt. It still didn't take off (maybe not enough yogurt?), so I added some sugar. That did the trick. Within an hour the starter was frothy and sour. (During feeding time, I mostly kept the starter on the counter at 65-72 degrees; at other times it was in the oven, sometimes on proof mode.)

On to the JB recipe: dark mountain rye. Saturday I took one teaspoon of Andrew's original starter and made a pre-ferment for the bread. Sunday, I mixed the bread, let it rise twice, and baked it. Monday night I took a bite... and wished I hadn't. Maybe I don't like 100% rye breads or maybe it was the seed mix, but it smelled/tasted a bit like Alpo to me. Eau de canned dog food. Yuck. Composted.

One bite was all it took... to realize I hate this bread

Saturday I also made a loaf of toasted sesame whole wheat bread (Hensperger p. 113) in the bread maker. I made the following adjustments: toasted walnut oil instead of sesame oil; reduced the salt to under 1 t; reduced the yeast to 1-1/2 t. I used the dark, flavorful Norcal honey.

Toasted sesame whole wheat bread

Unfortunately, the bread didn't taste very good by itself, although it did have a nice texture and was fine as a sandwich bread. I suspect walnut oil was a bad choice. I might try it again with another oil, since it would be very handy to have a flavorful bread that can be made on the delay timer. I might also increase the amount of sesame seeds; I couldn't see any inside the loaf.

I see no sesame seeds

Sometime that weekend I also made two batches of JB sourdough starter from Andrew's starter. One batch (started from Andrew's original) is in the fridge, and the other (started from a starter I created from Andrew's original) is in the kitchen. I'm curious as to which one I'll like best, both in terms of taste/behavior and in terms of the work to maintain it. You have to refresh the room-temperature starter every 2 days, while the fridge one will last "a few weeks". JB has you take the fridge starter out "a few days" before using it, so the fridge is most useful if you don't expect to bake sourdough 2/week, or you want to avoid wasting flour.

So far I've been good about refreshing the room-temperature starter every couple of days, but we'll see if that lasts.

Wednesday, August 26, 2015

Excaliburger buns, coconut castle pudding, and King Arthur's long covered baker

Inspired by the possibility of watching Excalibur with a bunch of friends, we decided to make Excaliburgers and a castle-shaped pudding.

We found this silicone castle mold while visiting family in France.
Find it at your neighborhood Eurodif.

We ended up watching Vampire in Brooklyn instead—I'm not sure why, but it probably came down to what people felt more like mocking. That didn't stop us from making hamburgers and pudding.

I also used a covered clay baker for the first time, making walnut sourdough. I love the form factor but need to work on the technique a bit.

Walnut sourdough baked in a long covered pan

For the pudding, we used the Tembleque Puerto Rican Coconut Pudding recipe, minus the salt. It's very simple: just coconut milk, sugar, and corn starch, plus a dusting of cinnamon. And it held the mold's shape beautifully, with great detail. One recipe wasn't quite enough to fill up the castle mold, so if we make it again, we might make a 150% batch so our castle isn't stubby.

Tembleque: Puerto Rican coconut pudding with cinnamon.
Very nice when served with cut mango
Another pudding that should work great with the mold would be mango pudding, if I can find a tasty enough recipe. I love the mango pudding from Ton Kiang in San Francisco; every other version I've had has been disappointing.

Hensperger's delicious hamburger—pardon me, Excaliburger—bun

The burger bun was a Hensperger recipe (p. 92) featuring egg, butter, milk powder, and potato flakes, all of which make for a moist and tender—yet not wimpy—bun. I ran out of bread flour, so I used a tiny amount of whole wheat flour. Very tiny.

Mia's burger (thanks for the picture, Mia!)

The buns worked really well with the massive (almost half pound), juicy hamburgers we grilled.

A dozen burger buns (picture by Mia)

I thought about stenciling the buns, either with flour or with seeds in a cross or sword shape. Maybe next time. I'm dying to try bread stenciling, and with two artists in the house who love bread, it shouldn't be too hard to get stencils. I just have to get the materials and figure out what I want the stencil to be.

On to sourdough. One of my birthday gifts arrived, a little late, and I had to try it out. It's King Arthur Flour's long covered baker.

A just-shaped loaf in the long covered baker

I tried baking a loaf of sourdough in it, but had to delegate the actual baking. The bread turned out pretty well, despite being a bit overproofed and overbaked. I can't wait to try it again.

Overproofed and overbaked, but still good

By the way, we had no problem at all with the bread sticking. I'd read that, early on before the baker is fully seasoned, the dough can stick, but I don't think that's a likely problem with a simple sourdough. I used ghee as an anti-stick coating for the pan, and nothing for the top.

Boring details about making this bread:

  • Sunday afternoon:
    • 12:30 finished mixing, and put it in the fridge because I had to leave the house.
    • 15:40 took it out
    • 16:40 first fold (still cold)
    • 17:00 second fold (still cool)
    • 17:20 third fold (still cool)
    • 17:45 added walnuts, mixing the dough as well as I could by hand
    • 17:55 left it to rise
    • 19:40 it looked pretty high, so I put it into the refrigerator
  • Monday morning:
    • 5:30 started shaping; the dough had risen to about 1" from the top of the 2-gallon container
    • 5:55 shaped and in the baker (see picture above)
    • 8:15 called home and asked someone to start baking, starting it in a cold oven 
    • 9:05 called and it still wasn't baking! Nagged.
    • As requested, the top was deeply slashed, then it went into a cold oven, which was then turned up to 425. I'd asked for the top to be removed after 30 minutes, but instead the whole thing was removed and the lid left on. Someone later realized that the bread hadn't been browned, so they put it back in the oven without the lid for a little while, and then took it out to cool. So. Rather overdone. This is a very forgiving bread. Note the use of passive voice to avoid assigning blame to people who were doing me favors so I can't complain.
Resources: