Tuesday, December 30, 2014

Beautiful bread with a biga

The Bread Lover's Bread Machine Cookbook has a few recipes that rely on a biga—a starter that you make at least a day before assembling and baking the bread. The biga recipe makes enough for at least half a dozen loaves of bread. It keeps in the fridge for up to 2 weeks, or you can freeze it for up to a month.

Measuring out some biga

I've tried 3 of the book's 6 biga recipes, so far:
  • Pane bigio: small, round, crusty bread with a bit of of whole wheat and buckwheat flour
  • Pagnotta: a round, crusty, floury country bread that resembles sourdough
  • Pane di cereale: shaped like pagnotta, but not crusty, and with a fair amount of whole wheat and cracked grains
They all worked out, more or less, and the pane di cereale has joined Zojirushi's pumpernickel recipe as one of my favorites.

I tried the pane bigio recipe first (on the 2nd day after starting the biga) because it has a crunchy crust and some whole grains (whole wheat and buckwheat). The bread had great texture (hard crust, soft interior) but tasted blah, since I used no salt. I'll try it again with half salt.

For the pagnotta (on the 4th day of biga) I thought I followed the instructions exactly, but I must have overcounted the flour measures: the dough turned out to be much too soft to work with. I almost threw it out, but my husband saved it, mixing a bunch more flour into it and pouring it into a lightly oiled, large bread pan. The result was tasty and had a great texture, but I wouldn't make it for myself; I like some whole grain in my bread. However, my daughter asked me to make "the sourdough" again, so I did.

The second attempt at pagnotta (on the 6th day of biga) turned out much better. I modified it slightly, reducing the salt to 1 teaspoon and the yeast to a scant teaspoon. I ran out of time to cook the bread, so after the second rise in the bread machine, I put the dough into a lightly oiled bowl, covered it with plastic wrap, and refrigerated it. The next morning, I shaped it, let it rise for the final time in the oven on proofing mode, and baked it.

Pagnotta

That is one delicious bread. I probably could have baked it a few minutes longer, but the taste is really really good. It's moist inside, with a chewy crust. Yum. My husband and daughter say it goes great with pâté, and it should be great toasted.

The bread was half-eaten by the time I got to taste it

Finally, I made pane di cereale on the 4th day of biga, right after the first pagnotta. I'd hesitated to make the pane di cereale because it has a soft crust, but on the other hand it also has the most whole grain of all the biga recipes. I modified the recipe slightly, reducing the salt and yeast to 1 teaspoon each. For the cereal I used Bob's Red Mill 10-grain.

Pane di cereale

This bread is delicious, even to salt eaters. We made chicken sandwiches with it, untoasted, and it stood up a little better than store-bought sandwich bread would have. Besides tasting good, this bread also looks good.

Pretty inside and out
We managed to fit it into our bread box. Barely.

Not quite bigger than a breadbox

I still have some biga left, even after a first, failed attempt at pane di cereale where I forgot to add yeast. I'll probably use it to make the pane bigio and pane di cereale again. If I manage to get some semolina flour and farina (Cream of Wheat), I might try the Italian semolina bread recipe. There's also a challah recipe that sounds intriguing, although I'm not usually into egg bread. I'll skip the pane all'uva; I love raisin bread, but savory raisin bread doesn't sound appealing.

A note about proofing: Our DCS range recently broke down, and rather than get the annoying beast repaired at great expense, we bought a Samsung stove. The new stove is much better in almost every way, and it has a proofing mode. My kitchen tends to be cold, so I've used the proofing mode for the final rise whenever the oven wasn't already in use. I'm no expert, but proofing mode has worked well for me, so far.

Monday, December 29, 2014

Good and bad apple breads

Back in November, we picked all the remaining apples off of our Pink Lady apple tree. We planted this tree (along a bunch of other fruit trees) 7 or so years ago, and this is the first year it bore more than a few apples.

Our Pink Lady apple tree

These apples are gorgeous and tasty, with a sweet-tart flavor that appeals even to green-apple lovers. They're great for eating as-is, but they also work well in applesauce and baking.

A Pink Lady apple

We tried two recipes:
The result of the first recipe was delicious, if a bit undercooked. We'll definitely try it again. The second bread we didn't even bother to freeze or save for bread pudding. It just didn't taste good.

The applesauce bread recipe is a variant of a Laurel's Kitchen banana bread recipe. It has lots of applesauce, plus raisins, walnuts, and spices. (We used big golden raisins I'd found at Berkeley Bowl.) The bread uses only whole wheat flour, and it has no eggs.

Good apple: the outside (the dark thing is a raisin that got extra cooked)
Our modifications were few. We added more walnuts than the recipe called for. We used all whole wheat bread flour, and no whole wheat pastry flour. Next time I'll either skip the cloves or use much less.

Good apple: the inside

The second apple bread was kind of an ordinary bread with chunks of apples and carrots added. It was slightly sweet, had perhaps too much gluten, and, like most of the recipes I've tried from that cookbook, just didn't taste great. A little salt might've helped, or more sugar and some spices.

Bad apple: the outside

It was weird to me that, in a book full of recipes that use a bit of applesauce, this bread didn't use any. Also, the book is usually very precise about amounts, but it just said "medium" apples. I'd have liked to have more guidance—weight or volume ranges.

Bad apple: the inside, with electric orange carrot bits

The first two loaves I made from this book (raisin bread and maple-walnut) were tasty, but I've had bad luck ever since. Lately I've been making breads from the Hensberger book, and even when I reduce the salt, those work out much better.

Tuesday, December 9, 2014

Pull-apart dinner roll bread

For Thanksgiving, I wanted to have freshly baked pull-apart bread from the bread machine. Finding recipes for this was hard enough that I worried that it wasn't a good idea. It ended up working pretty well, but could still use some tweaking.


I've already blogged about the first time I tried making pull-apart in the machine, using the honey whole-wheat recipe from Hensberger's Bread Machine Cookbook and techniques from the Zojirushi cookbook's weird recipe for "party bread". I also found a recipe for buttery herb-garlic pull-apart bread, which uses a bread machine and gave me the idea of dipping the top of each ball into butter or oil.

I decided to try the same honey whole-wheat recipe, and I planned to dip the bread balls into a mixture of melted butter and olive oil. This time I expected the bread dough to be sticky, and I knew (no thanks to the Zojirushi recipe) to use oiled surfaces when working with it.

I used the program from before, which is a modification of the Zojirushi recommendation:
  • no resting time before starting (instead I warmed the milk and water a bit in the microwave)
  • 20 minutes kneading (though I should probably do 22 minutes, like the whole-wheat cycle does, since the dough is somewhat sticky)
  • shape (up to 1 hour)
  • rise 1: skip
  • rise 2: skip 
  • rise 3: 45 minutes
  • bake: 40 minutes
During the shaping time, here's what I did:
  1. Take the dough out, put it in a ball, then put it into large oiled mixing bowl. (I used olive oil.)
  2. Cover with a damp cloth, and let the dough rise for 20 minutes (probably more like 25 minutes).
  3. While the dough is rising, remove the blades from the bread machine, and wipe out the pan.
  4. Push down the dough, and then shape it into 15 mini-balls, putting them into an oiled casserole dish.
  5. Cover with the damp cloth, and let the dough rise for 10 minutes (probably more like 15 minutes).
  6. Put the mini-balls into the pan of the bread machine. (I squeezed them to get rid of air. That's sort of like kneading.)
  7. Press Start, making the bread machine continue with rise 3.
Good lord, that was nerve wracking. The dough didn't seem to be rising much, and the mini-balls didn't fit as well into the pan as I remembered. I decided not to dip the mini-balls into oil/butter, since they were pretty oil covered already. The recipe does say "This one is a slow riser, so don't despair," so I was guardedly optimistic.

The outcome was pretty good, but interestingly, the dough wasn't as easy to pull apart as the time before. I guess the oil didn't separate the mini-balls like I thought it would.

Thanksgiving day, I tried lengthening the second rise and shortening the third one. (This happened to work out well, since the bastard turkey cooked faster than expected.)

All told, the time to make the bread was just short of 3 hours. Add an hour of bread machine warming (and the uncertainty of turkey cooking), and I could have started the rolls 4 hours before dinner. As it turns out, we had enough fridge space that I was able to do the first rise in the fridge, so I started the bread even earlier.

Using less oil helped the dough be a little easier to pull apart, but it still wasn't as easy as the first time. Perhaps a coating of flour or something else might make the dough-balls easier to pull apart. Ideas, anyone?

Sunday, November 16, 2014

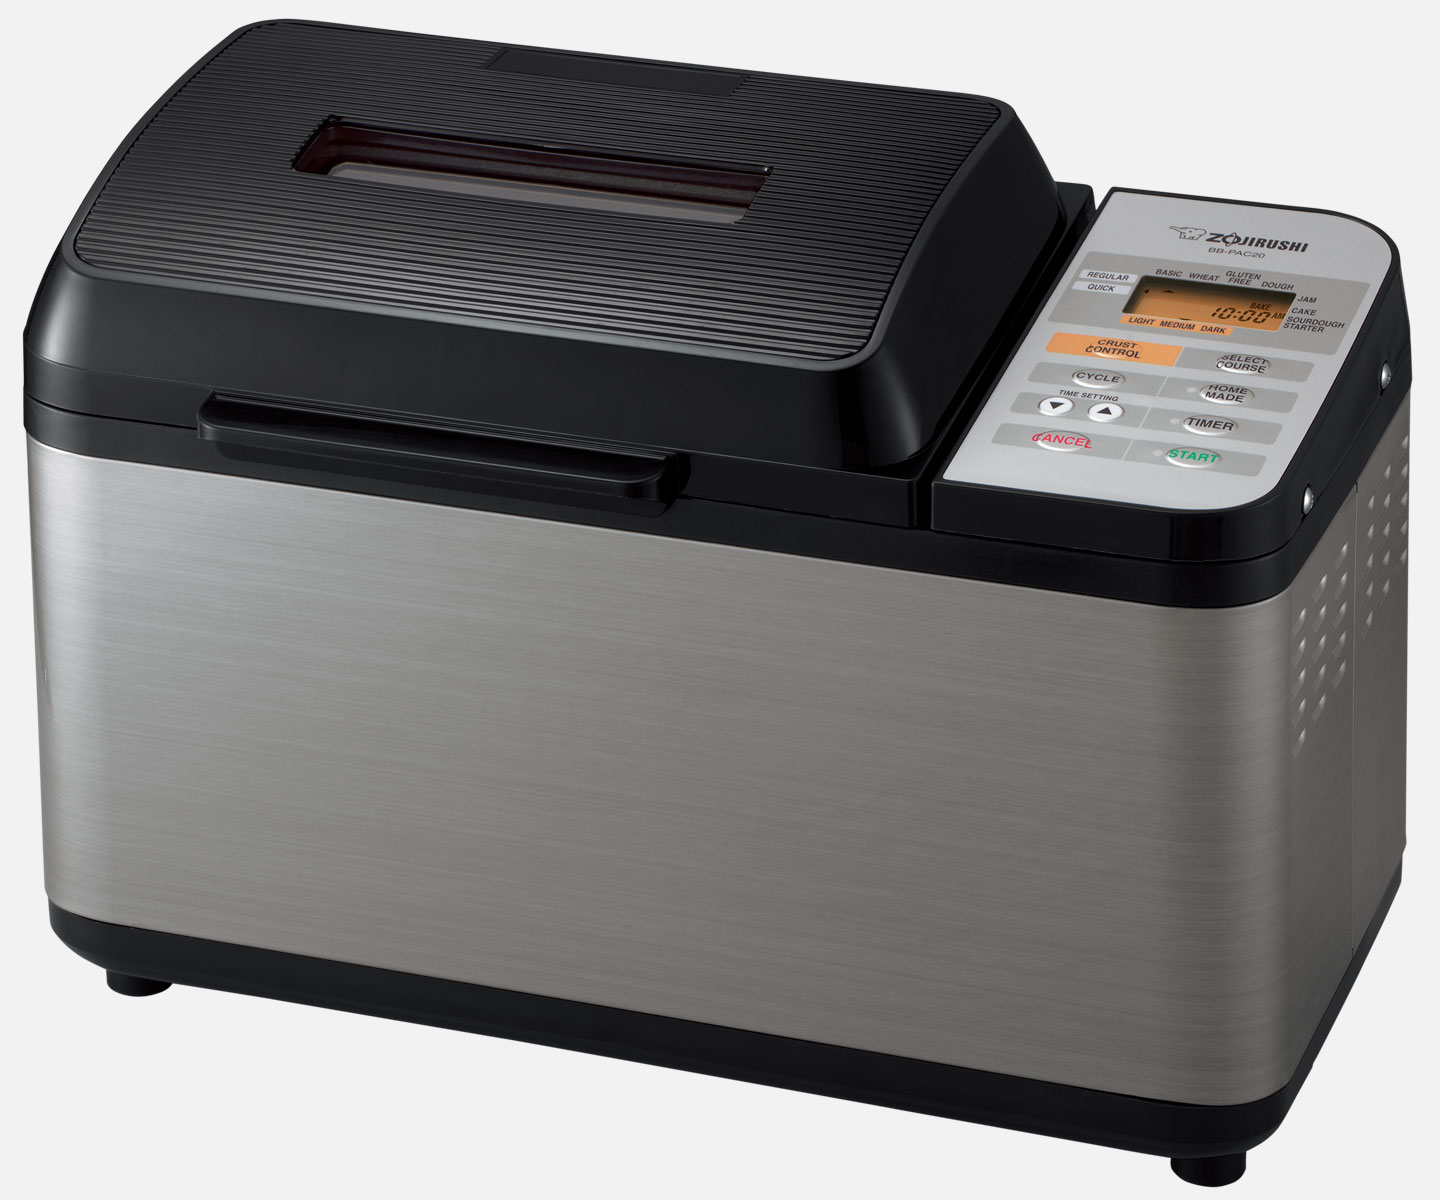
Goodbye old Zojirushi, hello new Zojirushi

I have a new bread machine! The old one was great the few times that it worked, but its single paddle soon stopped stirring at all. As I blogged before, the result was layered flour bricks like these:


If I stirred everything ahead of time, I could still use the machine to bake, which came in handy when my oven broke and I wanted to cook cornbread.

Thanks to the few times the old machine did work, I decided to buy myself a brand new Zojirushi.

Zojirushi Home Bakery Virtuoso (BB-PAC20)

I considered getting a machine that had an automatic dispensing tray for raisins or nuts, but that tray wasn't very big, and the machine just didn't sound as good.

The new machine has a few improvements over the old one, such one:
  • 2 mixing paddles instead of 1
  • Bigger capacity
  • Horizontal loaf rather than vertical
Here's what the new bread machine is producing:


Whole-wheat walnut bread

Whole-wheat and white, cooked with a timer

Pumpernickel, cooked with a timer

By the way, the pumpernickel is delicious. (Who knew that the dark color comes from coffee and cocoa? Crazy!) I used the Zojirushi recipe but reduced the salt to a pinch and the yeast to just over a teaspoon. I made similar adjustments to the other Zojirushi recipes.

The latest bread I tried was a pull-apart honey whole-wheat, using a recipe from Hensberger's Bread Machine Cookbook and techniques from the Zojirushi cookbook's weird, "home made variations" recipe for "party bread". This was a trial run for Thanksgiving dinner rolls. I want to cook them in the bread machine, if possible, so they'll be ultra-fresh and we won't have to use the oven for anything but turkey. Plus, you know, it'll be cool.

The remains of the honey whole-wheat
First, let me say that the bread was tasty. I don't know how well it'll keep, but since it's mostly gone, who cares. I made the 1-1/2 pound loaf recipe, reducing the salt to 1/2 teaspoon and yeast to 2 teaspoons.

Second, although the Zojirushi recipe is very unclear and incomplete, it worked better than I expected. The loaf, created from 15 mini-balls of dough, was fairly easy to pull apart, despite having no flour or cornmeal or oil/butter to keep the mini-balls from sticking to each other. I guess the mini-balls' little private rising time helped.

Third, although the Zo recipe calls for embedding sausage, chocolate, or cream cheese in each piece, I had nothing savory to put in them. I did, however, put a TJ's speculoos chocolate cup in one, just to see what would happen.  It was a bit messy, melting into a spreading puddle that my husband and I gleefully chased down. Perhaps chocolate chips might work better, since they supposedly don't melt as well. However, for dinner rolls I'd stick with savory fillings, if any.

By the way, the Hensberger book is one of several that my friend Shams recently gave to me. Thanks, Shams!

Sunday, November 9, 2014

Coconut-coffee-almond "ice cream" and raspberry sherbet

A few months back (near someone's birthday, probably mine), I made two not-quite-ice-creams in a row. Here's a picture of them with some birthday cake.


The first was a coconut cream based ice cream, flavored with coffee and with toasted chopped almonds mixed in. It was inspired by an internet recipe, although I don't recall which one. The base had 2 cans of Trader Joe's coconut cream, 3 packets of Starbucks Via instant coffee, less than a cup of sugar, and some vanilla.

The ingredients for the coconut-coffee base

The second dessert was a simple raspberry sherbet (raspberries, milk, sugar, a bit of lemon juice). I believe the recipe was from The Perfect Scoop.

Raspberry sherbet

Both were great, but I loved the sherbet best. It was fresh and clean tasting, and raspberries have such a pretty, intense color.

The coconut-coffee-almond seemed bitter at first (something I've noticed with other coconut-coffee combos) but after a couple of bites I really liked it.


Coming soon: goodbye to a broken bread machine, and hello to a beautiful new one.

Monday, August 18, 2014

Breadventures: A total loss and a partial save

Full of confidence after the success of my first loaf of bread, I tried setting up the machine to cook a loaf overnight. The result: complete failure.

Baked flour with yeast on top. Mmm mmm.

Toward the bottom was something vaguely resembling bread.

It's possible that the machine was to blame, but I suspect it was just that the recipe was too big. Next time I want to cook a loaf overnight, I'll try to make sure that it's a recipe that I've successfully used before.

Not to be put off, I tried another recipe: maple walnut bread. However, I still hadn't learned my lesson about the recipes being too large. I'd thought that maybe because this was a machine-kneaded, oven-cooked recipe, that the machine could deal with it. Silly me. This recipe had twice as much dough as a regular recipe of bread, so of course the machine couldn't deal with it.

After resetting the machine 2 or 3 times and poking the mix with a spatula, I finally got a mostly mixed dough. In a flash of smarts, I took out the dough and threw out half of it. I returned it to the machine for one last mix and its first rise, adding walnuts midway through the mixing.

The recipe had called for adding a cup of walnuts and perhaps a half cup of raisins. Since we'd already chopped the walnuts, I added all of them and left out the raisins. At this point, the dough had been kneaded so much, it was impossible to incorporate the walnuts, so they mostly ended up on the outside.

So there I was, with a weird, nut-covered dough. I punched it down and put it in a pan to rise again. And then I baked it.

The result? Delicious! It looked terrible (sadly, I took no pictures), but it had a wonderful, crunchy crust and excellent flavor.

I've since gone through the book and written, in pencil, the half-amounts for every ingredient of every recipe that I'd like to try.

Wednesday, August 13, 2014

Cinnamon raisin bread

Cinnamon raisin bread ice cream?

Nope! I'm branching out and reviewing recipes that aren't ice cream. It turns out you can't make tons of ice cream without you and your family gaining weight, so I'm taking a little break from weekly ice cream making. Bread is perhaps not a weight loss food, but it can't be as bad as ice cream.

Also, my parents gave me their old bread machine. I love bread but haven't been able to eat much of it since I started a low-sodium diet (which helps with an inner ear problem). Salt-free bread tastes bad to me, and it's hard—not impossible, but hard—to find regular bread that isn't high in sodium.

My bread adventures (let's call them breadventures) will start out featuring a Zojirushi BBCC-S15 bread maker and recipes from The No-Salt, Lowest-Sodium Baking Book by Donald Gazzaniga.

An oldie but a goodie

The book is a godsend but has a couple of problems. First, its recipes are for a 2-pound loaf, and my bread machine only makes up to 1.5-pound loaves. (I didn't realize this and ended up with bread baked onto the viewing window.) Second, I couldn't find any recipes that I could set up to cook overnight, given the basic ingredients I have. Many of the recipes require adding fruits or nuts partway through, or they use the bread machine only for kneading, not for baking.

Despite these problems, the cinnamon raisin bread was a success! The loaf had a great texture and crust—even though it languished in the machine for a few hours after baking—and it was tasty. When fresh it was good even untoasted. It was also great as a base for cinnamon toast, and should be perfect for bread pudding.

I'll make it again but try halving the recipe. I also might try using proportionately more raisins and perhaps cinnamon.

I'm not sure how much yeast to use when halving the recipe. The author says that salt inhibits yeast action (so I can't rely on regular bread recipes) and that smaller loaves rise more effectively, but then he gives an example of halving where the yeast is 2/3 of the full amount. Also, I found a site that says that cinnamon can inhibit yeast action, so if I add more cinnamon, I might have to use more yeast. Whatever. I think I'll just halve the cinnamon and yeast, and then adjust the recipe next time (if necessary).

This was not a low gluten recipe, by the way. It called for bread flour (high in protein/gluten) and additional "vital wheat gluten", which was probably what made the crust and texture so great. Obviously I don't mind eating dairy and sugar and gluten. Cutting out sodium is more than enough deprivation for me, thank you very much.

Stay tuned for more breadventures...

Sunday, July 20, 2014

Toasted almond ice cream & the NYT master recipe

Toasted almond was one of the first ice cream flavors I wanted to make. Just imagine fresh black and tan sundaes at home! TPS didn't have a recipe for toasted almond ice cream, though—just one for toasted almond and candied cherry ice cream. That's a totally different beast.

When a friend pointed me to the New York Times master ice cream recipe, I had to try its toasted almond variant. A friend's birthday request for ice cream gave me the perfect excuse. I decided to also make vanilla three ways: plain, with cookie dough mixins, and with malted milk ball mixins.


The base for the NYT master recipe is similar to TPS's vanilla ice cream base, minus the vanilla, and with a bit less sugar. I'm all for that sugar reduction, as many of TPS's recipes are a little sweet for my taste. Another difference is that TPS uses one less egg yolk in most of its recipes (though not the vanilla). Also, the NYT recipe doesn't bother will cooling off the base quickly: no ice bath, no cup of cream reserved to help cool down the custard.

Considering all this, I made the toasted almond ice cream using the ingredients listed in the NYT recipe but the techniques from TPS (except for reserving the cup of cream, which I plum forgot to do).

The recipe starts with cooking some almonds with sugar, always a dicey proposition, but I managed to do it without burning the almonds or the sugar. (Some almonds did end up very dark, but I culled them. With my mouth.)

The recipe then says to use the same pan to toast more almonds. Right. The pan that has hardening sugar on the verge of burning? I don't think so. I switched to another sauce pan, pouring boiling water into the original pan to clean it out.

The recipe isn't clear about when to steep the flavorings. Maybe the video made it clearer, but I didn't feel like watching it again, and really, you shouldn't have to watch a video in order to follow a recipe. The recipe seemed to say that I should steep the almonds in the cooked custard base, but it seemed weird to leave out hot eggs for an hour. I ended up steeping the almonds the TPS way: in the heated milk-cream-sugar mixture, before adding the eggs.

I was similarly bemused by the vanilla ice cream directions. I seemed to remember the video mentioning one vanilla bean, but the recipe called for two. Expensive! Also, I'd liked TPS's vanilla ice cream flavor, which used one bean and some vanilla extract. So I went completely TPS for the vanilla ice cream recipe, except for reducing the sugar a bit.

Whatever. Both ice creams were delicious.

Each of the 5 people at the birthday celebration had a warm brownie with 2 scoops of ice cream, resulting in the following ice cream distribution:

Toasted almond: 5 scoops
Vanilla with cookie dough: 4
Plain vanilla: 1
Vanilla with malted milk balls: 0

Wait! Here's the perfect excuse to try out the Google visualization API! Voila the distribution, charted:

Make your own pie charts at
https://code.google.com/apis/ajax/playground/?type=visualization#pie_chart

Before leaving, I asked the birthday girl if she wanted to keep any of the ice cream, and she opted for the remains of the cookie dough pint.

The "cookie dough", by the way, is made from a TPS recipe. It has very little flour and no eggs—mostly just butter, brown sugar, and chocolate chips. Yum. It usually has a huge amount of nuts, but I omitted them since the birthday girl isn't a huge fan of gilding the lily. (Also, I'd made cookie dough ice cream before, and Nathan had thought that the nuts overwhelmed the dough—although I was very happy with the flavor and crunch.) The recipe makes more cookie dough than you need for an entire batch of ice cream, but it was hard to divide, so we have lots left over that I put in the fridge with a big EAT ME sign.

Other random notes:
  • The vanilla ice cream froze rather hard. I wonder if this was because it was in uninsulated paper containers. Or perhaps it's because we overcooked it a bit, leaving some scrambled eggs in the strainer. (I had an assistant who's a great baker but new to stovetop custards.)
  • The toasted almond ice cream had less cream than the vanilla ice cream but still had a great consistency and was easier to scoop. The nut fat seemed to more than make up for the missing cream. Also, using an insulated container might have helped.
  • Interestingly, TPS's toasted almond (and candied cherry) ice cream doesn't reduce the amount of cream. Wow, that's rich.
  • TPS's recipe includes a whole cup of chopped, toasted almonds as a mixin, instead of half a cup of slivered, caramelized almonds. The caramelized almonds were delicious and subtle, but I want to try the massive amounts of chopped almonds next time.

The remains of the toasted almond ice cream

Still here? Here's the code that drew the chart:

function drawVisualization({
  // Create and populate the data table.
  var data google.visualization.arrayToDataTable([
    ['Flavor''# of eaters'],
    ['Toasted almond'5],
    ['Vanilla with cookie dough'4],
    ['Plain vanilla'1],
    ['Vanilla with malted milk balls'0]
  ]);

  // Create and draw the visualization.
  new google.visualization.PieChart(document.getElementById('visualization')).
      draw(data{title:"What ice cream did we eat?"is3Dtrue});
}

(My real job is not making ice cream, but writing about Google APIs. I edited an early version of the charting API docs, and I've always wanted to use them.)

Friday, July 4, 2014

Butter brickle

Whew! This ice cream seemed doomed from the start, but it turned out all right.

A scoop of butter brickle ice cream, with a bit of toffee as garnish

My friend Sharon had suggested that I make butter brickle ice cream, and I found a recipe that sounded right to her. It's basically an eggless ice cream that features butter, brown sugar, and bits of toffee. With ingredients like that, how could you go wrong?

Well, first off, you could make the toffee yourself, which isn't a foolproof process. And indeed, it went very wrong, with the butterfat separating from the rest of the toffee. Fortunately, enough butter and sugar stayed mixed that part of the resulting mess was toffee.

Something resembling toffee
(or maybe a map of an arid state)

Second, you could make the ice cream using a butter-milk-sugar mix—similar to the butter-sugar mix that's so treacherous in toffee—and have the texture go all rough and chunky. Fortunately, a stick blender restored the mix to a creamy consistency.

After chilling overnight, the top was solid and cracked
Not an appetizing texture

Fortunately, no matter how bad the toffee or mix looked, they tasted great. Sugar and butter just do, unless you burn them.

I could've bought Heath toffee bits instead of making toffee. However, I didn't see them in any local stores, and I didn't order them because making this ice cream was a rather last-minute endeavor. (I needed to think of a gift for my Aunt Lola's birthday party, and when her son told me she enjoyed ice cream with praline/almond/caramel flavors, I figured it was the time to break out the brickle.)

The recipe made more mix than usual, and by the time I added the toffee bits at the end, the ice cream maker was full and straining a bit.

Mixing in bits of toffee

This ice cream is very sweet and melts quickly, but everyone who's tasted it has really liked it. If I make it again, I'll order Heath toffee bits ahead of time. However, I would like to try making toffee again. The ice cream was good, but I love toffee, covered with dark chocolate and studded with almonds. Mmmm...

Monday, June 30, 2014

Coffee ice cream

I tried making coffee ice cream once before, using The Perfect Scoop's recipe, which had me soaking coffee beans in hot milk for an hour. The result was too bitter for me, so I vowed to try again.

This time, I used Emeril Lagasse's coffee ice cream recipe. It has a custard base, similar to the recipe in TPS, but it makes a larger amount of ice cream. It called for 6 large egg yolks, but all we had were jumbo eggs, so I used 5 jumbo egg yolks. It also called for instant coffee, rather than coffee beans. I used nearly 5 little packets of Starbucks VIA Ready Brew.

It expired April 2013, but still tasted good.

The resulting mix was darker brown than the steeped coffee bean version.

The mix before adding in the last cup of cream.

Churning took about half an hour, which is what I expected for this larger than usual batch. It filled our ice cream container to the top.

The result was delicious, either plain or with roasted almond slivers. I'm sure chocolate sauce would be good, too.

Yum

Strangely, the texture seemed a little icier and less smooth than usual. It might just be because the proportions were different than usual, or perhaps there's something about instant coffee that encourages iciness.

Next time I might try the usual TPS ice cream recipe with 1-1/2 Tbsp of instant coffee and perhaps a few drops of vanilla.

Saturday, June 28, 2014

Malted milk ice cream (yum!)

This week I made malted milk ice cream, and it was a big hit.

Husbot: "It's my favorite flavor."
Sonbot: "This is one of the best ice creams I've ever had." "Better even than Cherry Garcia?" "Yeah."
Dotbot: "It would be better with fewer malt balls. But it's probably my favorite that you've made, from what I could taste of it." (She thought there were so many mixins that you could hardly taste the ice cream. That was certainly true, but it didn't bother anyone else.)

This recipe (from The Perfect Scoop, naturally) has a typical custard base, but with more egg yolk. It has malted milk powder added to the custard, and chopped malted milk balls mixed in. I more or less quartered the milk balls, which I got from a bulk bin at Nob Hill Grocery.

Malted milk balls (dark chocolate covered)

At first it didn't seem like the malt powder would mix in completely, but it did.

Carnation Malted Milk
(similar to Horlicks, which is supposed to be stronger;
I'd like to try Horlicks sometime)

The ice cream seemed like it might be too sweet, but the malted milk balls (which were covered in 60% dark chocolate) added a sufficiently complex, semi-savory taste to counterbalance the sugar. Sonbot even loved the last cup of ice cream that I packed, which had almost no mixins.

The suhweet ice cream mixture

I agree with dotbot that we could've used fewer malted milk balls, overall. The first pint I packed had so many mixins, it seemed like there were more mixins than ice cream. I was layering, more than mixing, for that pint, because the recipe said to fold in the mixins. Usually, you add the mixins during the last 5 minutes of churning, but maybe the recipe didn't call for that for fear of smooshing the milk balls.

After the first pint, I realized that I should just mix the malted milk balls in the churning bowl, but I didn't scrape the sides before doing that, so the last cup of ice had almost no mixins. Next time—which will be soon—I'll try reducing the mixins by 1/3 or so, and scraping down the sides of the churning bowl before mixing in the bowl.

Too many mixins (but fewer than the first pint)


Thursday, June 19, 2014

Black currant ice cream

For my latest ice cream, I went back to a traditional custard, if not a traditional flavor.


I'd made green tea ice cream before, using matcha (yum!), but I'd never made an ice cream by infusing tea leaves.

After steeping

It felt wrong to steep the tea leaves for an hour, but I didn't notice any bitterness in the result.

After adding egg yolks

The mix churned for perhaps a few minutes longer than usual.

At the start of churning

With a creamy, tasty result.

The finished ice cream

This is a good ice cream (especially with chocolate sauce), but it's not as delicious as the matcha green tea ice cream. I'm thinking of making matcha ice cream and a steeped green tea ice cream at the same time, just to compare to each other. I'm also interested in ways to avoid steeping the tea leaves for so long.


Saturday, June 14, 2014

Plum granita & plum-ginger-honey ice cream

With my plum tree's explosion still in full effect, I had to do something quick to use up the fruit. This time, I picked two recipes from the web, each of which uses 2 pounds of plums:
I modified both recipes:
  • Halved the ginger because I got tired of grating ginger, and I worried—unnecessarily, as it turned out—that it would overpower the other flavors.
  • Omitted the water from the granita because the plums were so darned juicy.
  • Reduced the sugar because the plums were so sweet, and because I didn't add water to the granita. I halved the sugar in the granita and used the lower amount of honey in the ice cream.
  • Quartered (or so) the vanilla in the granita because the plums had so much flavor.
  • Omitted the salt because I'm on a reduced-sodium diet.
  • Halved the brandy in the ice cream because I didn't want it to taste alcoholic.
Of the two, I like the granita best. Strike that—I love the granita. It's great tasting and a crazy, electric red color. Plus the process of freezing the granita is fun in a low-tech way. 

The brightly colored plum skins make the juice neon red.

I'm less sure about the ice cream. At first, I worried that it would be inedible, since the ginger tasted way too raw and strong at first. However, the ginger flavor mellowed as the mix chilled, and I couldn't even taste the ginger in the final product.

Roasting the plums was just kind of funny (for me) and frustrating (for my husband) because I outsourced the plum prep to my husband. Even though I tried to give him the firmest plums, he was cursing all through the process of trying to cut the plums in half and separate out the pits.

The plums, post roast.

Another problem ingredient was the honey. It overwhelmed all the other flavors, probably because I picked a dark, intense honey rather than a lighter, milder honey. However, the honey did give the ice cream a fantastic texture and an interesting taste (if you're into honey).

I used the dark honey on the left.
I probably should've used the light honey on the right.

And then there was the Sriracha. Just as I put the mixture in the fridge to chill, a bottle of Sriracha took a header and pierced through the plastic wrap. None of the hot sauce appeared to get out, though; at least, when I took a spoon to the landing site, I had no "you've got chocolate in my peanut butter" revelation.

The resulting mixture took a little longer than usual to churn, but it ended up with a very nice texture and a good flavor (if light on ginger and heavy on honey).


I probably won't make the ice cream recipe again, but I might well try other honey recipes. I'll probably try roasting fruit again, but only if it isn't too juicy. Also, I'll keep in mind that ginger mellows with cooking and sitting time. Lots of lessons learned this time!