Showing posts with label equipment. Show all posts

Sunday, March 20, 2016

Cranberry-walnut sourdough is delicious (and other lessons learned)

I've been making lots of sourdough lately. My favorite had dried cranberries and toasted walnuts.

Cranberry walnut sourdough #2

Rather than dwelling on individual loaves, this post summarizes what's worked and what hasn't lately. As usual, the sourdough is based on Josey Baker's recipes.

How much fruit & nuts?

When I make a loaf that's just walnuts, I usually use 1 cup (or more) of toasted walnuts. When the loaf is fruit and nuts, I use 3/4 cup of toasted nuts and 1/2 cup of dried fruit.

To soak or not to soak?

If you have great dried fruit, I don't think you need to soak it. If you do soak, 20 minutes in hot water seems sufficient, but be sure to drain the fruit really well.

I didn't soak the cranberries the first time I made cranberry-walnut bread, and the bread was still delicious. A big part of their deliciousness was that the cranberries were great. I think I got them at Berkeley Bowl.

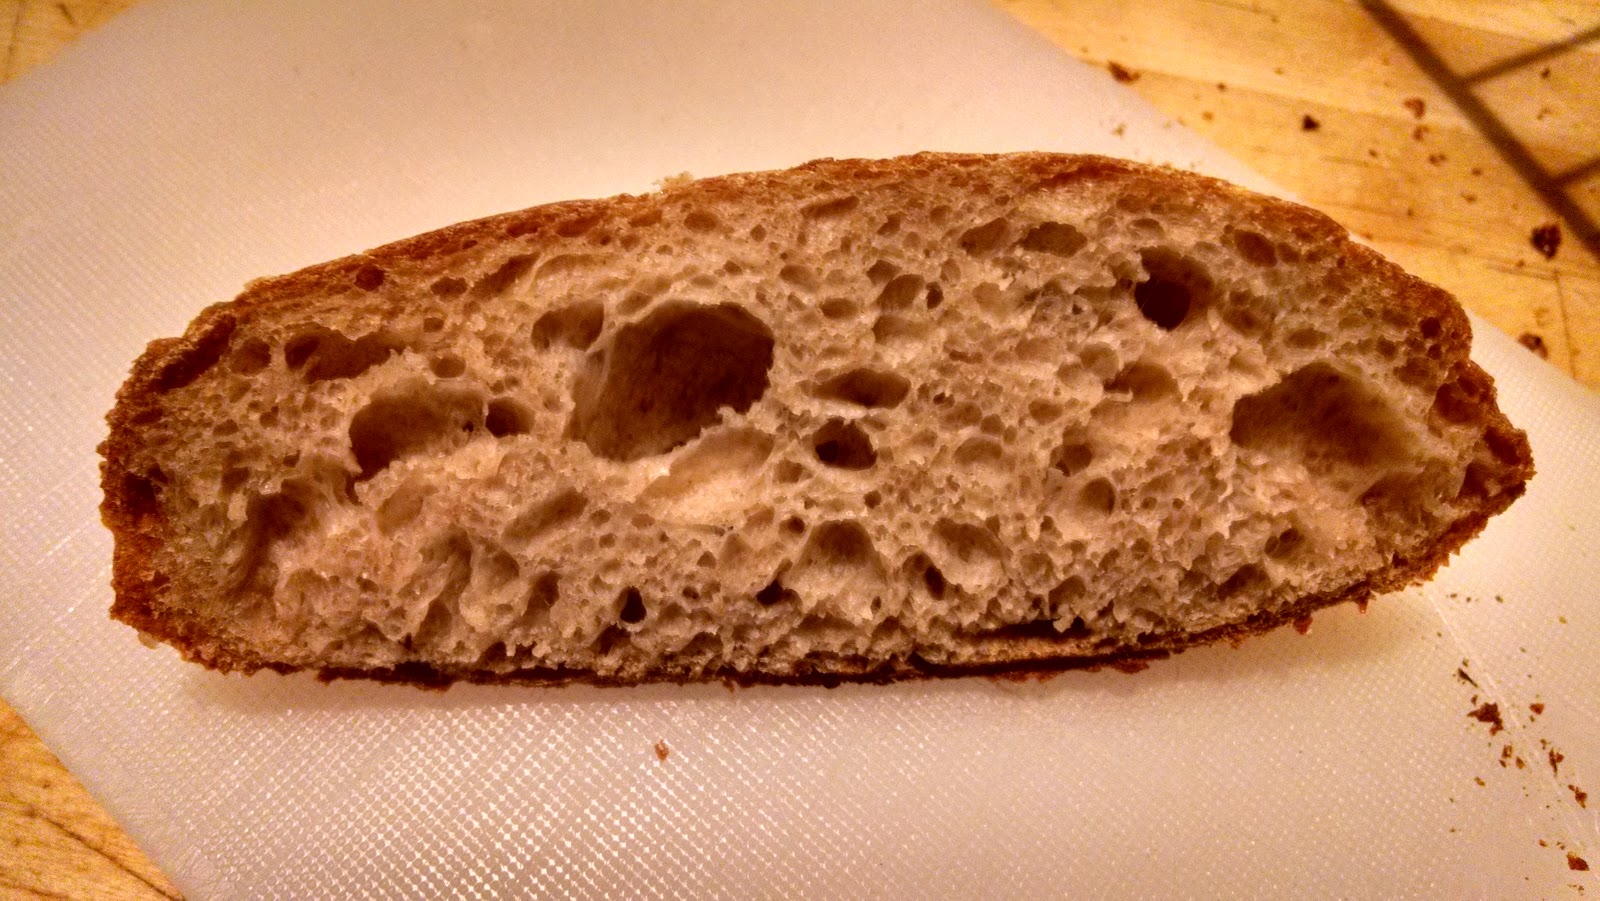
Interior of cranberry-walnut loaf #1


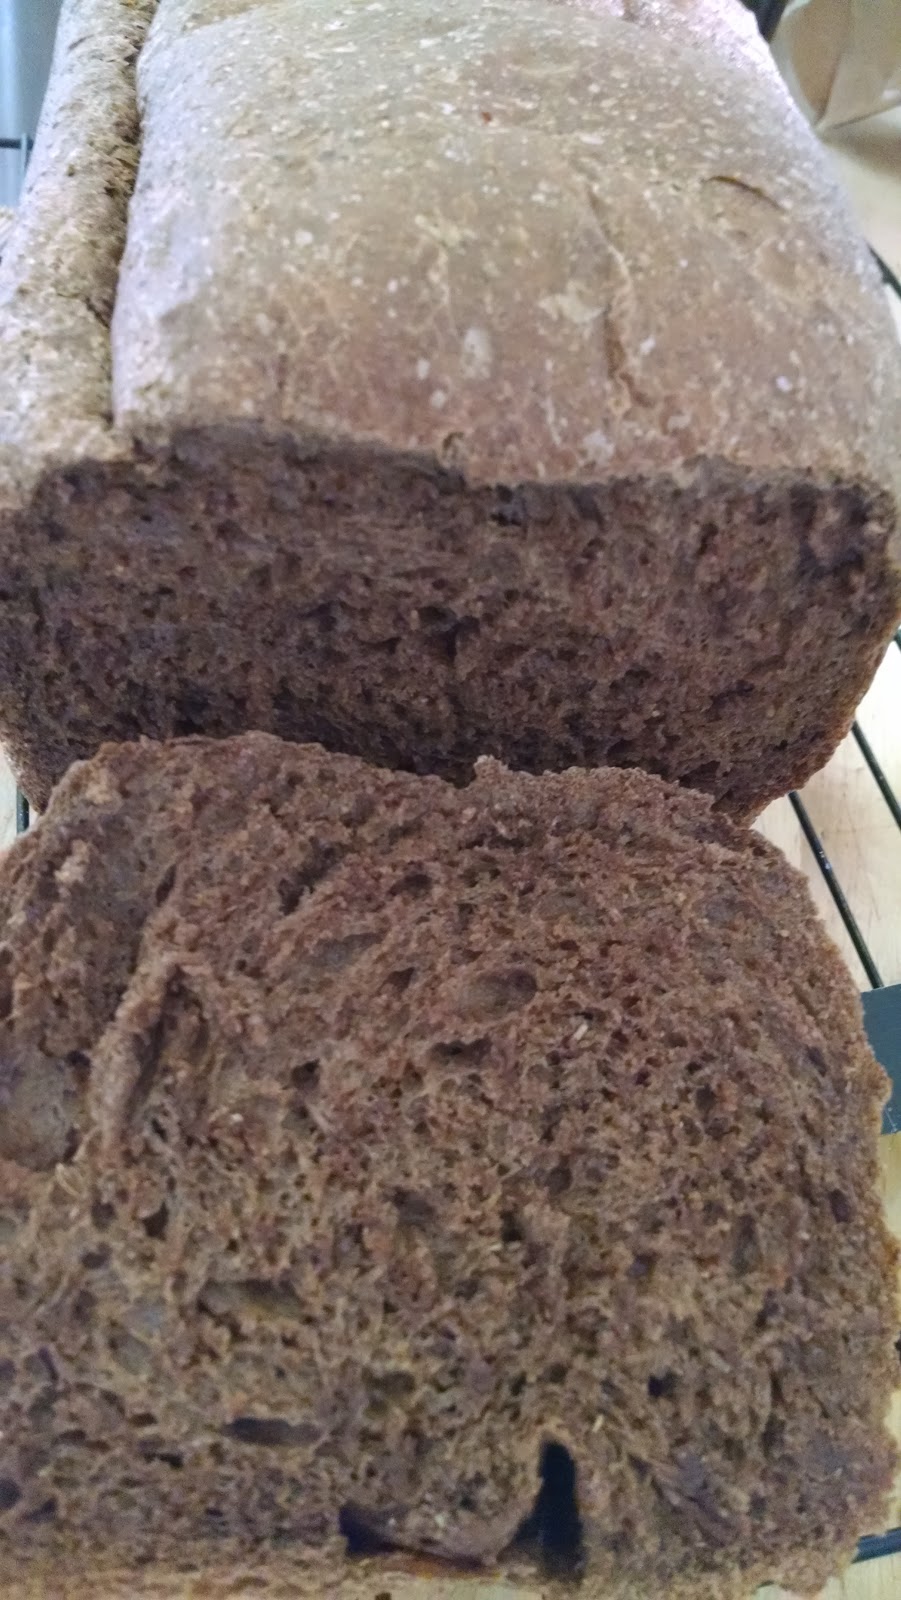
The second time I made cranberry-walnut bread, I used cranberries from Trader Joe's. They were fine but not great, so I didn't love the bread quite as much. I soaked them and should have drained them for longer, but the end result was still a very nice bread. You can see from the pictures that the cranberries in loaf #1 were larger and more deeply colored. They just had a lot more flavor than those in loaf #2.

Interior of cranberry-walnut loaf #2

In a raisin-pecan loaf that I made, I soaked and drained the raisins, both for longer than I did the cranberries. That worked out well, but I don't think you need to soak the fruit for that long.

When to add the fruit & nuts

I used to add walnuts just after mixing in the flour. That's probably the easiest way to go, but the dough is discolored by the walnuts: near the walnuts, the dough is purplish, as you can see in my other posts about walnut sourdoughs.

Another option I tried is adding the walnuts and fruit during shaping. This worked OK, but the distribution wasn't very good, and you have no possibility of reshaping if you mess it up.

Take my raisin-pecan sourdough. I spread its dough out flat, then spread out the soaked raisins and toasted pecans, and then rolled it all up. But the dough had no surface tension, so I ended up folding it into thirds to make it a little more likely rise and get a nice ear. 

Raisin-pecan sourdough

As you can see from the picture above, the shape is a little odd, but I did get that ear. Unfortunately, it was along one of the seams (at the top of the picture), not where I diagonally scored the bread. Also, raisins peeked out of the scores. Not a good look.

Inside the raisin-pecan sourdough

The distribution of raisins and nuts was uneven, but not as bad as I feared.

With both cranberry-walnut sourdoughs, I mixed in the fruit and nuts after my last fold-and-stretch knead. This wasn't as hard as I feared.

The winner: cranberry-walnut sourdough #1

The loaf had no ear (my boules never do), but the bread was delicious, with the mixins well distributed throughout.

Delayed baking and flying roofs

I often don't bake the bread the same day that I start it. Instead, I let it rise in the refrigerator, so I can bake it when I need it, and the bread can gain depth of flavor. In my house, we like sourdough.

For my last couple of batches, I created enough dough for two loaves. One loaf I shape immediately (to either bake right away or put in the fridge for a day or two), and the other I put in the fridge, unshaped. The next day I'll shape the second loaf.

I recently was having lots of flying roofs—the top crust would separate from the bread below it. The cause seemed to be taking the shaped loaf out of the fridge before I was ready to put it in the oven. Once I changed to baking cold dough, right out of the fridge, the flying roofs went away.

Sesame sourdough looked good on the outside

The sesame sourdough was my most recent victim of a flying roof.

Flying roof (not as bad as some I've had)

Baking pans & form factor

For boules, I use either the bare cooking stone with a large, squat stock pot on top or (more recently) a huge dutch oven.

Large, squat stock pot

The dutch oven is a little scarier, but it worked out really well when I somehow used a cloth to maneuver the dough into it, as opposed to when I used a parchment paper sling. (The parchment paper made the loaf's edges wavy and was hard to remove, since it got brittle.) I need to try the dutch oven again.

Huge dutch oven

For longer loaves, I used to use the same stone + stock pot combo as for a boule, but sometimes I'd misposition the pot, and the edge of the loaf would be a little weirdly shaped. Last time, I used my long, low, 5-quart Le Creuset pan. I was afraid it wasn't tall enough, but it worked out great.

5 quart Le Creuset worked great for a longer loaf

For really long loaves, I use the King Arthur covered baker. It's a handy form factor, but the crust isn't as nice. I baked my most recent plain sourdough in the covered baker, so it'd be easier to share with my parents.

Just before going into the oven.
This dough was a bit wet and overproofed;
slashing did not go well.

The crust looks nice, but I don't like it as much

Inside the end piece


Tuesday, October 27, 2015

Dutch oven walnut (no-knead) sourdough, poppy-sesame seed sourdough, and a failed cornbread

In which I bake good and meh sourdoughs from the same batch, cook a practically inedible cornbread, and consider no-knead bread...

Sourdough breads


Dutch oven loaf vs. baking stone loaf

I've often been disappointed in the height of my sourdough loaves, but I'm very happy with the walnut sourdough loaf I just baked in a Dutch oven. However, the Dutch oven wasn't the only difference between this and my usual sourdough:
  • I never kneaded the dough, at all. Not even a stretch.
  • After mixing the dough (sans walnuts), I put it in the refrigerator for 3.5 days. (I don't remember if I refrigerated it right away or waited a bit. I might have punched down the dough after a day or two.)
  • I preheated the oven with a stone on a low shelf and the Dutch oven (but not its lid) on the middle shelf. (I put the lid on when the bread went in.)
  • I preheated the oven at 500 degrees, meaning to turn it down to 475 right after adding the dough, but forgetting for a couple of minutes.
  • I put the dough in the Dutch oven seam-side up (using a dishcloth to maneuver the loaf without getting close to the burning hot pot). I also tried to slash the loaf a bit, but that didn't take.

No walnuts in this piece... but it's still good

Also worth noting: the dough was exactly the same as the sesame-poppy seed dough. I'd made a double batch, immediately mixing soaked seeds into the other half. I baked the seeded loaf the day after mixing, using a baking stone and (as soon as I remembered) a big pot as a cover.

I've realized that I don't like poppy-sesame seed sourdough. I'm not sure whether that's because the recipe has way more seeds than the sesame seed bread I've loved in the past, or because I just don't like poppy seeds in sourdough. The bread was fine when toasted, but I won't be making it again.

Lots and lots of seeds in and on this loaf

Cornbread

I'd made this skillet cornbread successfully before, but this time it was gummy and pale, with weird bubbles. Yuck! I think I did two things wrong:
  1. Preheated the skillet. It was supposed to go in the oven for a couple of minutes, but I left it in much longer. Although preheating is good for flour-water-salt kinds of bread, apparently it isn't for something that's more like a quick bread.
  2. Maybe mixed it too much.
Better luck next time.

Notes on no-knead bread

One of these days I might try this recipe for no-knead dough (parens indicate my calculations for a couple of sizes I might try):

To 100 parts flour (375/150 g), add 1.5 parts salt (~5/2 g) and 1 part (~4/1.5 g) instant yeast. Whisk those together. Add 70 parts (~262/105 g) water, and stir to combine. Cover, then let rise overnight. Transfer to the fridge, let ferment for three days, then turn dough out on to a well-floured surface. Shape dough, sprinkle with flour, and cover with a floured cloth. Let it rise for at least two hours and up to 4 at room temperature. Slash, then bake in a preheated 450°F Dutch Oven for 15 minutes with the lid on. Remove the lid, and continue baking until it hits around 209°F, 30 minutes or so. Let it cool.
From http://www.seriouseats.com/2011/06/the-food-lab-the-science-of-no-knead-dough.html

Tuesday, September 29, 2015

Walnut sourdough bread & peanut butter ice cream

It was too hot much of last week to bake, but the weather was perfect for a no-cook, same-day ice cream like peanut butter. Toward the end of the week, I also made a walnut sourdough, which is becoming one of my favorite breads.

Walnut sourdough

I've made walnut sourdough before, both with and without the long covered baker. After my weird (though tasty) sourdough last week, I felt like I needed to go back to the original recipe and not mess with the timing so much.

Walnut sourdough, cooked in a long, covered baker

I used the usual Josey Baker recipe, but added walnuts (maybe 1 cup). I deliberately kept the dough a little drier than it has been. I think I've been putting > 1 cup of water in there, but I used a scant cup this time. The toasted walnuts also might have absorbed some water. This dough was much easier to handle than it has been lately.

Walnuts ready for toasting

The conveniently pre-chopped walnut pieces came from Trader Joe's. Previously I'd chopped whole walnuts from Berkeley Bowl, but the TJ pre-chopped nuts are much more convenient, and they tasted just as good to me (after toasting, at least). I just tossed a bunch onto a cookie sheet, put the sheet in the oven, and turned the oven to 350.

I mixed in the walnut pieces (maybe 3/4 cup?) during what would normally be the first mini-knead. The dough was easy to handle, so I sort of picked it up and mashed it around to distribute the nuts.

After the last mini-knead

The rest of the mini-kneads were the usual Josey Baker process of picking up the edge and stretching it gently, turning the bowl a tiny bit, repeat 10 times or so.

A couple of hours after the last mini-knead, the dough had risen quite a bit and was ready to shape.

Ready to shape

I really need to take a shaping class, but here's what I did this time. I put it out onto a well-floured board. After making sure the dough wouldn't stick (using a dough blade to scrape it up, putting flour underneath, and turning it over a couple of times) I patted it into a rectangle. I folded the rectangle into thirds and let it rest. After a few minutes, I folded the dough in half again and rolled it a little bit. I then put it into the gheed baker.

The shaped dough in the long, ghee-brushed baker

2.5 hours later, it looked ready to go into the oven.

After rising

Rats! I forgot to slash it! No matter, it didn't seem to mind.

I didn't notice when the oven reached 450, and the color from the walnuts made it difficult to tell how brown the crust was. About 30 minutes after the bread went into the cold oven, I took off the top of the baker. I took it out of the oven about 10 minutes later.

Partial remains of the loaf

We had to take it to a friend's house (40 minutes away by car) while it was still hot, making the car smell heavenly. We couldn't resist tearing off some to eat. When the loaf was merely warm, we put it into a lunch bag for ease of carrying.

Greasy paper bag, thanks to the walnuts

The bread worked well cut thick and used to hold thin turkey burgers. The next day it was great as a base for tuna sandwiches. And, of course, it was great alone.

Timing details:
  • Midnight or so Friday: refreshed the starter
  • 9 am Saturday: mixed the dough and toasted walnuts
  • 9:40: mixed in the walnut pieces
  • 10:15, 10:30, 10:50: mini-kneads
  • 1:45: started shaping
  • 2:05: put it into the ghee-brushed baker
  • 4:35: put it into the oven; turned the oven on to 450
  • 5:05: took the top of the pan off
  • 5:15: took the loaf out of the oven
Temperature details:
  • The water I added to the starter was 88 degrees, by probe or by laser (pronounced LAY-zerrrrr). (The recipe called for 80 degrees.)
  • The kitchen was 73 degrees when I started, 75 by the time the dough started resting at 9:10, and 79 by 2.

Peanut butter ice cream

Peanut butter ice cream is easy and quick to make, following the recipe in The Perfect Scoop. I had a request to make peanut butter chocolate, so I mixed chocolate chunks into most of the batch. I love PBJ ice cream, so I made a bit of that, too. Sadly, I had no Bonne Maman, so I settled for another brand of raspberry preserves. Both the PBC and the PBJ were very good, especially the first day before the ice cream hardened.

Sorry, no pictures.


Sunday, September 13, 2015

Baguettes and two old standbys

I was away this weekend, but the week before I made baguettes again—successfully!—and a couple of bread machine loaves: toasted sesame and Bohemian black bread (BBB). Then for this weekend, I made the toasted sesame bread again.

Toasted sesame bread #1, uneven as usual (but tasty)

The toasted sesame bread seems to always turn out much higher on one side than the other. I thought maybe it was due to my not sprinkling the salt on evenly, but even when I mixed the salt with the water for loaf #2, the loaf was uneven.

Toasted sesame bread #2, still uneven

Now I'm thinking that perhaps the problem is simply that the bread is 100% whole wheat, and (even on the whole wheat cycle) the bread simply tends to clump around one mixing paddle more than the other.

A possible solution might be to check the dough when the raisin/nut beeps sound, to make sure it's even. It's not a big deal, though. The unevenness doesn't affect the taste or texture at all, just the size.

Toasted sesame is becoming my go-to bread. It's 100% whole wheat, it smells great, and it tastes great with everything except sweet toppings. It's great with tuna or pesto, and very good as a PBJ bread, but not so great with butter & jam or butter & cinnamon sugar.

Inside toasted sesame bread

Last week's Bohemian black bread (BBB) was fairly even, but a bit lower in the middle. I think that might be caused by the dough separating into two halves, each one centered on a mixing paddle. BBB has less whole grain than the sesame bread, fwiw.

Bohemian black bread (BBB)

The BBB was much lighter in color this time, since instead of using black cocoa I used Lake Champlain Chocolates cocoa, which is a light reddish brown. I need to get some more of that black cocoa.

The inside of BBB

On to baguettes.

A week ago Thursday and Saturday, I refreshed the white sourdough starter. Saturday morning I refreshed the whole wheat starter. Sunday I made baguettes.

I used a variant of King Arthur Flour's sourdough baguette recipe, ending up with these ingredients (almost identical to the first batch, except I used all-purpose flour + gluten instead of bread flour):
  • 1/2 cup + 2 T lukewarm water
  • 1 cup sourdough starter (I used white only)
  • 2 1/4 cups all-purpose flour
  • 2 tsp gluten
  • 1 t salt
  • 1/2 T bread machine yeast
I forgot the gluten until a couple of minutes into the mixing. Whoops! Canceled the cycle, added the gluten, and started the dough cycle again.


Around 5:45 I took the dough out, shaped it, and put it in the gheed baker (where gheed is to ghee what oiled is to oil).

I wet a dish towel, put it on a cookie sheet, and then awkwardly dipped the top side of each baguette onto the sheet. I put the largest baguette in the middle. I added raw, whole buckwheat to the top baguette.

From top to bottom: buckwheat, biggest, prettiest

I accidentally turned the oven on before putting the baker in. I didn't realize until it was already hot, but I turned it off while the loaves finished rising.

About to go into the oven

I might have overbaked the bread a little bit, but my family and I liked it. It had a nice crust (though perhaps a little thick) and tasty, tender innards. And it didn't stick to the pan, at all!

Buckwheat covered baguette

We started with the buckwheat-covered baguette. A lot of the buckwheat fell off, but that just made it that much more fun for my daughter and me to go on a little treasure hunt of the cutting board.

The buckwheat-covered baguette didn't last long

The next day we had about 1.5 loaves left, which we used for chicken sandwiches. It was so nice to have a real baguette sandwich again! It made me want to find a recipe for banh mi bread, the craptastic bread that makes a terrific holder for delicious Vietnamese fillings. Here are some recipes that I might try:
Back to traditional baguette recipes, I'm thinking about trying some of the following recipes from King Arthur Flour, all but one of which require an overnight rest:

Thursday, September 3, 2015

Baguettes (starring Emile Henry) and onion sourdough

This week: baguettes! (Cue Flight of the Conchords' Foux Du Fafa.) I also made an onion sourdough before the weekend (new for me), mixing the dough Thursday night and shaping it Friday morning before going to work.

The baguette baker

This Emile Henry baguette baker was the last of my birthday presents to arrive. 

From my enabling-in-a-good-way husband

The baker came with a recipe book filled with lies, such as using flour to prevent sticking. Unfortunately, I believed the book the first time I tried making baguettes.

The first batch of baguettes stuck badly

All the baguettes stuck to the pan. One even stuck to the top of the pan, which made removing the top a challenge. When I finally managed to get the top off, most of the stuck loaf's crust tore off.

The biggest loaf stuck to the top

As a result, Saturday night we had pieces of baguette with dinner. Delicious, crusty pieces, but still... pieces.

What we could scrape out of the baguette pan

Lessons for next time:
  • Oil, don't flour, the pan.
  • Be careful about watering the tops of the baguettes.
  • Put the biggest baguette in the center.
  • Always look at King Arthur's site before trying to use equipment they carry.

Baguette trial #1

Here are more details about my first try with the baguette baker.

I looked at four recipes:
  • Hensperger's pain de paris (p. 216)
  • Hensperger's classic baguettes (p. 204)
  • Emile Henry's "The real French baguette"
  • King Arthur's recipe for sourdough baguettes
I ended up using kind of a mix:
  • 1/2 cup + 2 T lukewarm water
  • 1 cup sourdough starter (I used white only)
  • 2 1/4 cups bread flour (most called for all-purpose flour plus gluten, but I had no all-purpose)
  • 1 t salt
  • 1/2 T yeast
The recipe in the Emile Henry book called for just 2 cups of flour (3/4 less than the King Arthur recipe, if you count the half cup in the sourdough starter), so I considered taking out 1/3 of the dough for baking separately. But then I weighed the dough, and it was just over the 600 g that the Emile Henry dough should have weighed, so I decided against removing any.

The dough was quite slack (my new word of the week), but I used a ton of flour on the board, and a dough card as necessary. I managed to shape the baguettes, more or less, although my hands ended up covered in dough.

Shaped and ready to rise

I don't trust my ability to eyeball quantities, so I weighed the dough when dividing it in 3. That was kind of a pain, so I should just try to just eyeball it in the future.

After rising

I decided to slash one baguette, leave one unslashed, and put sesame seeds on one. I brushed all of them with water.

After slashing, splashing, and seeding

Coming out of the oven, they looked nice enough, even though half the top of the slashed one came off.

Fresh out of the oven

The crusts were crunchy, and the insides were delish. If only they had come out of the baker in one piece, I would have called them successful.

A success, if you ignore the fact that the loaves were in many pieces


Baguette trial #2

The next day I tried again, using the King Arthur recipe for sourdough baguettes, sugar and all. I halved it because 3 baguettes is plenty. So, along with the salt/yeast adjustments I always make, that meant:
  • 5/8 cup lukewarm water
  • 1 cup sourdough starter (I mixed my white and wheat starters to get the thick pancake batter consistency it called for)
  • 2 1/4 cups bread flour (I had gotten all-purpose flour in the meantime, but I didn't want to change too much from the last time, so I used bread flour and no additional gluten)
  • 1 teaspoon sugar
  • 1/2 tablespoon bread yeast (not instant yeast)
I put all this into the bread machine and got the dough cycle going. I started 4 pm Sunday afternoon, and started shaping the loaves around 5:30 pm. By 5:50 they were shaped and in the pan. (The kitchen was fairly warm but probably a few degrees cooler than the day before.)

Shaped

I decided to experiment a bit with the toppings, and to forgo slashing. The middle baguette had just canola oil spray; the others had olive oil and seeds (pumpkin or fennel). I feared that oil with toppings was a bad idea, but the egg yolk wash that the recipe recommended sounded like it might stick to the pan.

Ready to go into the oven
Top: olive oil & pumpkin seeds
Middle: canola oil spray
Bottom: olive oil & fennel seeds

I preheated the oven to 475. At 7:15 (perhaps a bit early, but I was out of time) I put loaves into oven, turning it down to 450.

Oil meant no sticking, and less crunch. Boo.

The results were OK but not great. This time, there was no sticking at all, but the crust wasn't as crunchy, and the loaves were flat. The taste was fine, but I don't see any reason to add sugar to the dough.

Next time, I'll oil the pan but water the baguettes. I'll also make sure the baguettes rise long enough.


Onion sourdough

Thursday night I cooked an onion in some olive oil.

Cooked and cooled onion

I then made my usual Josey Baker sourdough loaf, but with the cooled onion added.

The dough just after mixing

I did the usual 4 stretches of the dough. This dough was pretty darned slack, probably because of the olive oil in the onions.

After the final stretch

After less than an hour of rise time, I put the dough into the fridge.

About to go into the refrigerator
The green line is the dough's height just after mixing

When I woke up the next morning, I took the dough out of the refrigerator. The kitchen was pretty warm (81) before I opened the back door, which cooled us off a few degrees.

Fresh out of the fridge

I shaped the bread and put it in the long covered baker.

Shaped and ready to rise again

Almost 3 hours later, I decided it was ready to go.

Ready to slash

My guys took it out of the oven and sent me this pic.

All baked

My husband adored this bread warm. It was fine once cool, too, but when it was warm you could really smell and taste the onion.

A slice of onion sourdough

Details:
  • 9.5 oz onion
  • Thursday night:
    • 20:25 mix all done
    • 21:05 stretch #1
    • 21:25 stretch #2
    • 21:45 stretch #3
    • 22:05 stretch #4
    • 22:50 into the fridge
  • Friday morning:
    • 6:15 took out of fridge, let rest a bit, started to shape
    • 6:35 shaping complete; resting in baker
    • 9:18 slashed (badly) and put into oven, which I then turned on to 425 degrees
    • After the oven got to 425, I set a timer for 30 minutes and left for work.
    • My peeps took off the lid at 30 minutes, and then left it in the oven to brown for a few minutes more.