Showing posts with label Hensperger. Show all posts

Thursday, February 11, 2016

Oatmeal stout bread flops, plus pot pies, spelt bread, and beans

In this episode, I endure a frustrating series of failures, ended only by giving up. I also sing the praises of pastry flour, spelt flour, and heirloom beans.

Mini-mash oatmeal stout bread

My husband brewed oatmeal stout, using a kit from MoreBeer. They call this one a mini-mash, since it has so much grain. The recipe calls for 4 pounds of malted barley (half of it 2-row, and the remainder 4 different kinds of dark malts), 1 pound flaked oats, and 4 oz wheat—over 5 pounds of grains! Most recipes my husband has brewed use 1/2 to 1 pound.

The huge amount of grains (while not nearly as much as an all-grain recipe) meant my husband couldn't put all the grains in bags. (The first part of making beer is soaking the grains in hot water, as if you were making tea, but the soaking takes a lot longer.) As a result, he couldn't strain most of the grains, and (although I couldn't see this) they were apparently much wetter than usual.

That's a lot of spent grain

We saved about 6 cups of the spent grain for breads. The grain didn't look noticeably different from others I'd used, but they acted much different.
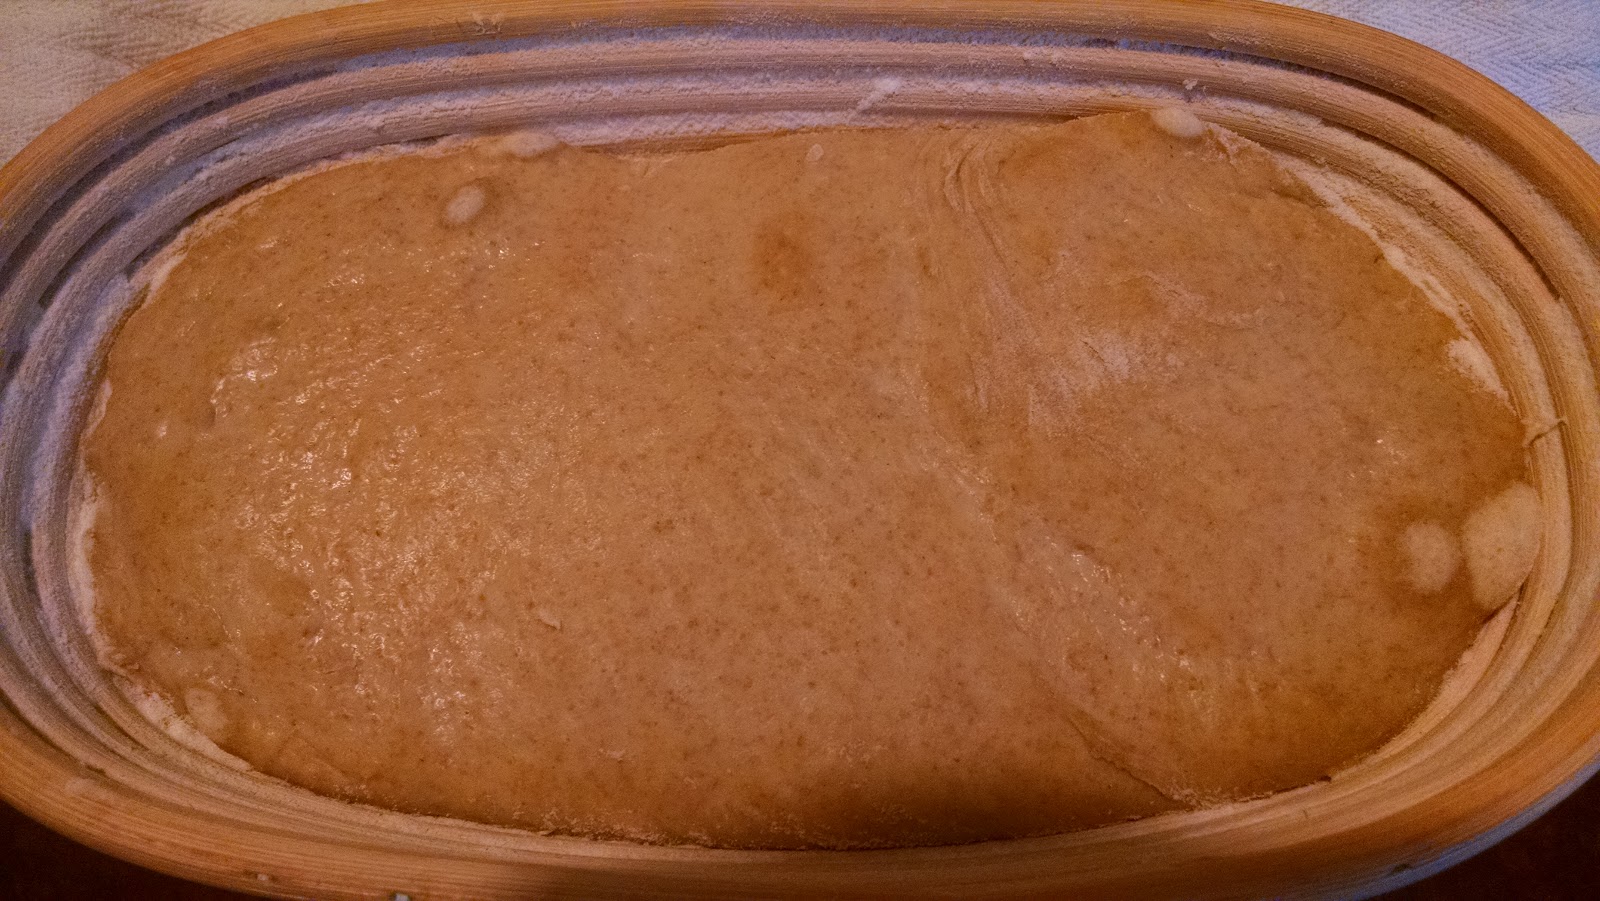
Flop #1


Sunken and inedibly gummy

The usual recipe, except that I used a full cup of water, not a scant cup.
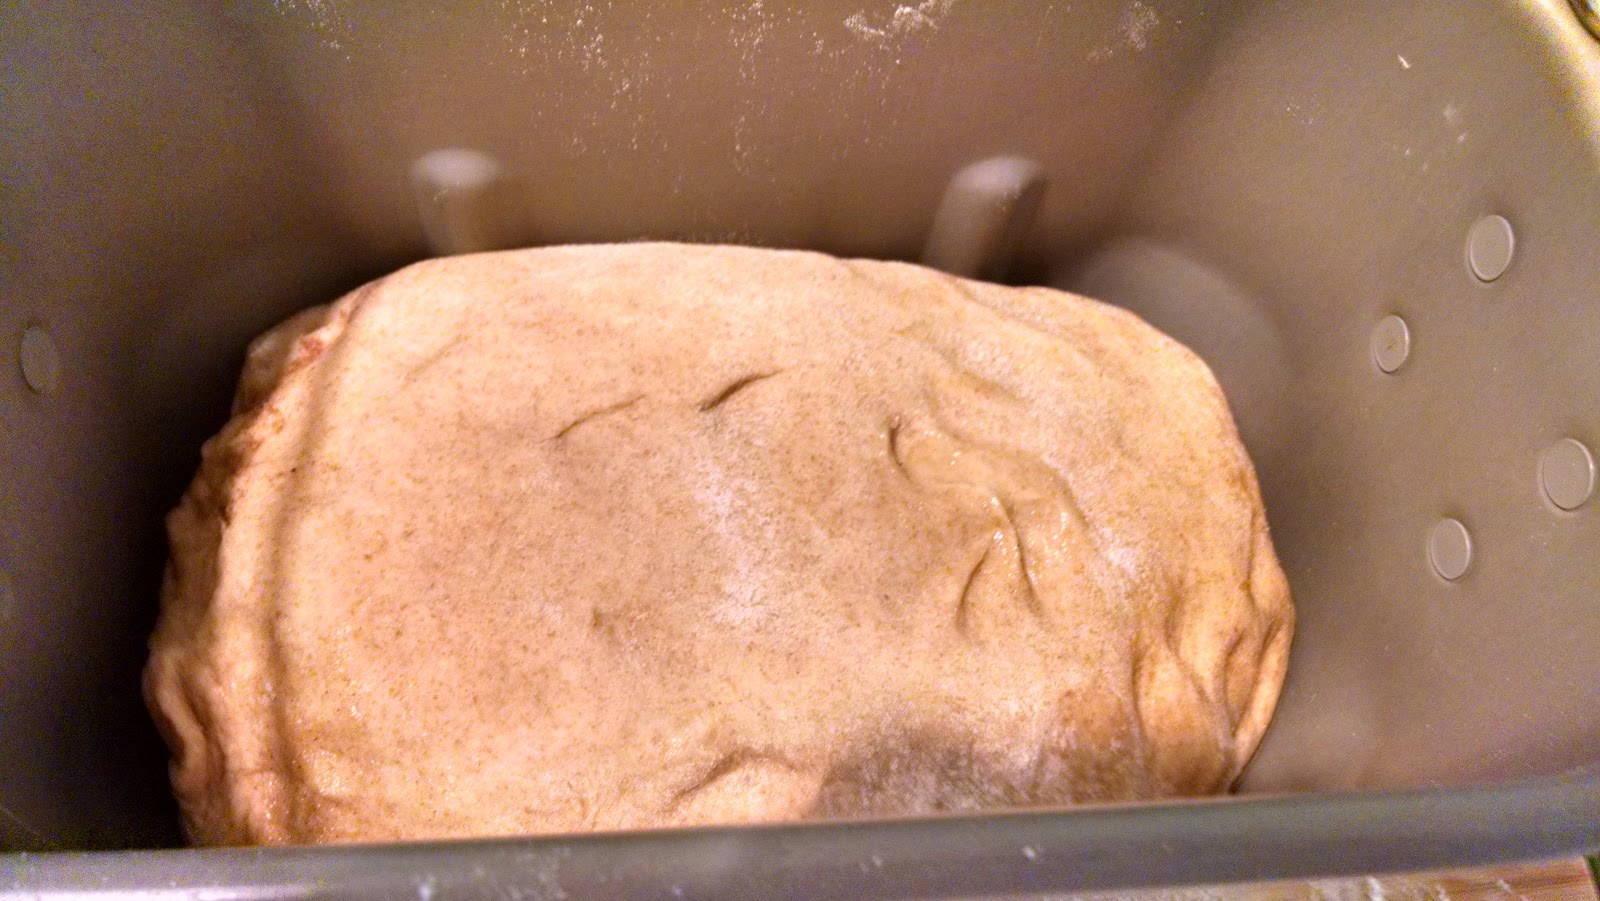
Flop #2

Less sunken, and almost edible

I reduced the water to 3/4 cup, and I used the regular cycle instead of whole wheat. This one looked and tasted more like my normal spent grain bread, except that it was collapsed and gummy — both of which are exaggerations of tendencies that were evident but not problematic in my other spent grain breads.

Flop #3

Hensperger says the collapse due to too much yeast action, so I reduced the yeast to 3/4 teaspoon. I think I used the whole wheat cycle.

The result looked just like flop #2.

Try #4

Same as flop #3, except the honey changed (to something similar) and I added 30 g more of bread flour.

The result looked just like flops #2 & 3.

If I ever make bread from a mini-mash again, I'll be sure to squeeze the grains thoroughly before measuring them. Yeesh.

Turkey pot pie

During this time of failure, I took solace in my husband's delicious turkey pot pie. One double-crust recipe produced enough pot pies for me to eat one or two helpings every day. That's probably not good for my waistline, but they tasted so good!

Reheated for 20 minutes at 350 degrees

Nate's always made good pie crusts, but lately they're amazing—great flavor and texture. He credits a new flour he's been using: King Arthur's pastry flour blend. I'd bought that flour along with their excellent cocoa powders (both black and triple), cinnamon chips, and a bunch of bread flours that I have yet to try.

Better than all-purpose flour for pie crusts

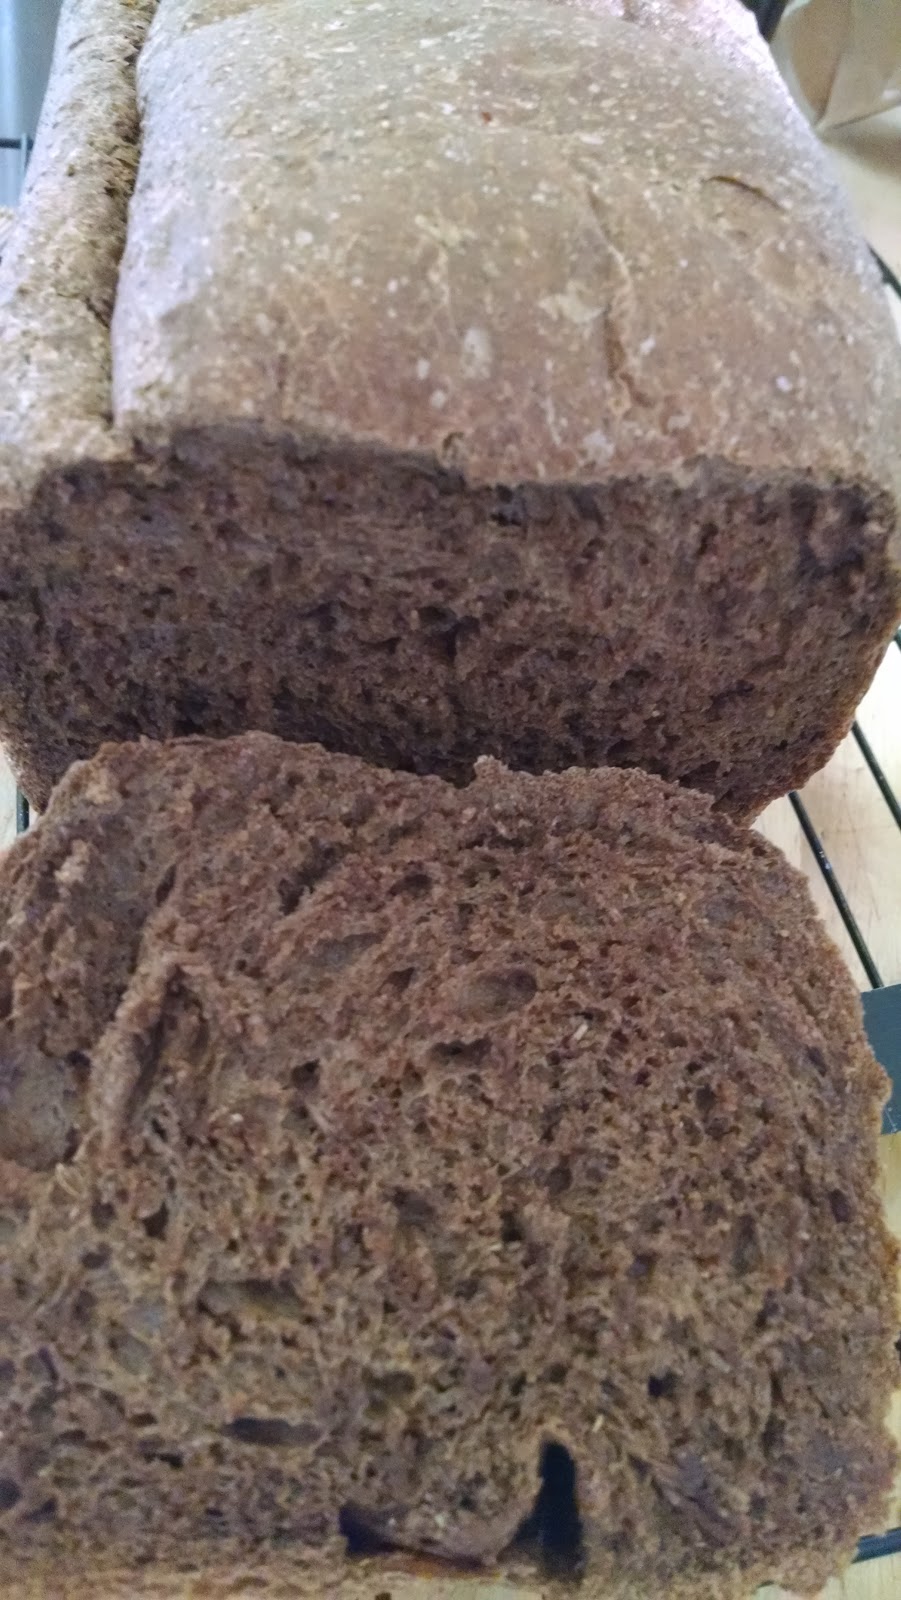
Whole-wheat toasted sesame bread

After so many bread failures, I went back to an old favorite, Hensperger's whole-wheat toasted sesame bread. And I forgot to put the paddles in the bread machine. The result was, needless to say, inedible—a cracker topped by flour and yeast. Mmm, mmm, mmmmm.

The next day, having recovered enough to try again, I realized I was out of whole-wheat flour. So I made the bread again, using spelt flour I had in the freezer. The bag said you could substitute the flour one-for-one for whole-wheat flour, so I did.

And it worked. Yay!

Finally, a success!

Magical fruit

Finally, I recently when to the Rancho Gordo store in the Ferry Building (on my way back from watching adorable puppies play on a mock football field). My haul included some chile powder, oregano, and hot sauce, plus five kinds of beans:
  • Santa Maria Pinquitos
  • Royal Corona
  • Ayocote Amarillo
  • Vaquero
  • Alubia Blanca
I recently cooked the Alubia Blanca beans in the Instant Pot I got for Christmas.  Into the pot went1 pound of unsoaked beans, water to cover by 1.5+ inches, and a bay leaf. I put it on for 25 minutes on manual. The results were tasty, but unfortunately we aren't used to using beans in this household. I never got around to making a salad (perhaps Alubia Blanca salad with pineapple vinaigrette), but I did enjoy the beans as a quick snack/lunch when nothing else was available. I'd just stir up the beans with a few shakes of salt-free spice, and voila—a filling serving.

The next time I make a batch of beans, I'll plan better.

Wednesday, January 6, 2016

Swedish rye and Kölsch spent grain bread

For the first time in many months, I made Hensperger's Swedish rye bread (p. 136). I also made a spent grain bread, using still warm grains and some barley syrup left over from my husband's latest brew.

I made the following adjustments to the Swedish rye recipe:
  • Reduced salt to less than 3/4 teaspoon (maybe 1/2 teaspoon; I didn't measure precisely).
  • Reduced yeast to a scant 1.5 teaspoons.
  • Reduced gluten to 1 T (mostly because I couldn't be bothered to find a clean teaspoon measure).
  • Used organic safflower oil and TJ's multi-floral and clover honey (northern U.S.).
As I have been doing lately, I put the oil, honey, and salt in with the water. I didn't want to stay up until 2:30 a.m. for this bread to cook, so I put it on a delay timer for 9 a.m.

I denuded a huge orange for this bread.

The bread smelled great the next morning. It looked pretty good, too, if a little lumpy.

Rorschach test: What does this bread look like?

Most importantly, the Swedish rye bread smelled and tasted really good. We didn't quite finish it, but we sawed quite a bit of it away before abandoning it.

Next, I baked the same spent grain recipe I've been making for a while, but with leftovers from brewing Kölsch ale. I even scraped the malt syrup jar so I could use liquid malt extract instead of honey. Here are the details:
  • Instead of 2T honey, I used 2T barley syrup (which was half Pilsen and half Munich).
  • The spent grain (3/4 cup) was half white wheat malt and half crystal 10°L.
  • The 2T of oil was safflower (organic), instead of olive, because I wanted to taste the grain and barley.
  • As before, the first things into the bread pan were the spent grain, oil, syrup, salt (3/4 t), and a scant cup of water.
  • As before, I used 2-1/4 c bread flour, 3/4 c whole wheat flour, and 1t bread machine yeast.
  • The rising bread was way over on one paddle's side, so I picked it up early and redistributed it.

Spent grain going into the bread pan

The bread came out looking pretty good.

Lighter than the other breads, as you'd expect given the grains

The taste of the bread was good, but I wasn't crazy about the texture. The bread was soft, like a buttermilk or potato bread. That didn't bother my husband, who ate a bunch of it the night it was baked.

I didn't notice the pyramidal shape of this loaf right away,
so I suspect it got squeezed at the top when it was first sliced.

If I can find any malt syrup, I might make this bread again, doing everything the same except changing the crust control to dark.

Wednesday, December 9, 2015

North English brown ale bread

My husband was itching to brew a new batch of beer, using a kit we'd recently bought from Beer and Wine Makers of America, down in San Jose. It didn't hurt that his Christmas gift had arrived and was obviously the brewing hardware he'd asked for. Yes, Nathan gets to open Christmas presents early. Way early.

The kit was for North English Brown Ale, and the spent grain smelled delicious—dark without the bitter overtones of his last beer, Celebration Ale. He mentioned that the brewing process was different from the one he was used to, and that not all of the grain got soaked. More on that later.

I was eager to make bread with the spent grain, but I decided to make a smaller loaf. I basically multiplied all the ingredients of the recipe I like (Snappy Service Cafe's Homebrewed to Home Baked: Spent Grain Bread) by 3/4 to 2/3, using Hensperger's similar recipe (whole grain daily bread, p. 181) as a guide. The ingredient list ended up being:
  • Scant 1 cup water
  • 3/4 cup spent grain, firmly packed
  • 2 T canola oil
  • 2 T honey
  • 2-1/4 c bread flour
  • 3/4 c whole wheat flour
  • 3/4 t salt
  • 1 t bread machine yeast
The Hensperger recipe, besides using buttermilk instead of water and having slightly different proportions, also calls for a bit of rolled oats and gluten. But I stayed with the Snappy recipe's ingredient list.

I used a new honey this time, from Bay Area Bee Company.

Mmmm... This is a great smelling honey.

Another change I made was using the delay timer (on basic cycle, regular crust). I set it to finish at 6:30 a.m., before my alarm goes off but after I sometimes wake up anyway. If I got it out right away, it'd have time to cool before I had to leave to catch the bus.

The next morning I woke up (a little early) to the delicious scent of baked brown bread. I took the loaf out of the bread machine and set it out to cool. It was tall and light for its size, with a nice, medium brown color—darker than the hefeweizen bread, but lighter than the celebration bread.

English brown ale bread, fresh out of the bread machine

An hour later I had to leave, and since the bread was almost cool, I felt free to cut a slice off. This is some tasty bread! Its only fault, as far as I'm concerned, is that some of the grain was a little hard on the teeth. This might be due to my husband's problem in getting all the grain wet and cooked.

First slice

I'll make this recipe again in these proportions. I have plenty of leftover grain from this batch of beer, and I might try cooking it a bit in the bread water (perhaps in the microwave) before putting it in the bread machine.

Monday, December 7, 2015

Two semolina breads

We needed some white bread to use for Thanksgiving stuffing, so I made a Hensperger recipe that features a bit of semolina: pane italiano (p. 208).

Tragically, the stuffing recipe used the whole loaf. Still craving semolina bread, I made a similar (but not as tasty) recipe a couple of days later: semolina country bread (p. 202). I soon tried the first loaf again, but it turned out to be quite different from the first time.

Pane italiano numero uno

I made the 1.5 pound loaf with no ingredient changes except for the usual halving of yeast and salt. I baked it on the normal cycle, not noticing that the recipe called for extra kneading, accomplished using either the French bread cycle or by resetting the machine to double the kneading time. The recipe calls for a dark crust, but I specified a normal crust, figuring that stuffing bread needn't be overbaked.

I should've made the 2 pound loaf so we could've had some left over! The little bits that stuck to the paddles were delicious and crunchy—semolina's a great ingredient. The crust had some big bubbles for some reason. I couldn't resist poking one, and it shattered.

No picture, unfortunately. But the stuffing was really good.

Pane italiano numero due

When I made the bread again, I still used the 1.5# recipe, but I measured by weight instead of by volume. That was probably a mistake, as the recipe specifies only volume, and I think that the flour bag's weight/volume ratio was too high, resulting in more flour than when I measured by volume.

Otherwise, I followed the recipe instructions more precisely than before. I specified a dark crust and reset the machine after kneading was finished, so it could knead again. I checked the consistency when I reset the machine; it seemed dry, so I added some water. Then, unfortunately, I had to go to bed, so I didn't get to see the bread until the next morning. 

The loaf was much taller than before—too tall to fit into the breadbox unless I took out the cutting board. It wasn't noticeably darker than before, and it wasn't crisp at all by the time I saw it.

A very tall loaf

We liked it OK, but it's just kind of a semi-interesting white bread at this point. I have a feeling that this bread is much better if you eat it while it's warm.

If time allows, I prefer the Italian semolina bread recipe (p. 252). I might make pane italiano again, but only for stuffing bread or if I plan to eat it right after it finishes. And I'll measure by volume.

One good thing about pane italiano is that you can make it using a delay timer. I'd have to create a homemade course to be able to do the extra kneading without intervention. (My machine doesn't have a French bread setting, which would make the extra kneading happen automatically.)

Semolina country bread (pane di semola)

This bread has a higher proportion of semolina than the first, with no sugar or potato flakes. It also has sesame seeds, which make it a little more interesting. But not much more.

Cooked on dark, this bread doesn't look very dark
(the side wasn't as dark as this picture makes it seem)

This bread was fine, but I probably won't make it again.


Wednesday, November 11, 2015

Hefeweizen & penuche breads, plus terminology

As I mentioned in my last post, I had some wonderful smelling grain left over from my husband's wheat beer brewing; I put it into some bread. Then last week I made some cinnamon bread that I've made before, which has what Hensperger calls a penuche filling. I also made toasted sesame whole-wheat bread (great with tuna sandwiches!) but that's an old standby; nothing new to say there.

Before I get into the bread, let me geek out about words.

Today's words: Hefeweizen & penuche

At least one northern German I've met has expressed bemusement at the term Hefeweizen, saying the Hefe was unnecessary: it's just wheat beer (Weizen or Weizenbier), as opposed to yeast-wheat beer. (I'm always tempted to think of Hefe as meaning "boss", like the Spanish jefe, but it really means yeast.) Wheat beer names differ by language, brewing region, and recipe variation. Many of the German names have Weiss instead of Weizen in them. Weiss means white and, interestingly, in both English and German weiss/white has the same etymological root as Weizen/wheat.

On to penuche. I first came across the word in Hensperger's cinnamon bread recipe (p. 281). She describes penuche as "a melted filling of sugar, butter, vanilla, and nuts," and says that the word means "brown sugar" or "raw sugar" in Spanish. The word had looked vaguely French to me, so I'd wanted to pronounce it peh-NOOSH (OO as in noon, not book). But Spanish? That seems like peh-NOOCH-ay. But this is 'merica, so apparently it's pronounced puh-NOOCH-ee.

Wikipedia says the Spanish word is actually panocha, but that word (as I found out from some unexpected Google search results) usually means something cruder in Mexican Spanish. The Mexican brown sugar is more commonly called panela.

It's a little weird that Hensperger uses the word penuche for her cinnamon filling, since the filling isn't at all fudgy. Also, the penuche recipes I found have no cinnamon, at all. They feature brown sugar, butter, and milk of some sort; other common ingredients are vanilla, nuts, and additional sugar such as corn syrup. But I suppose everything in the filling except the cinnamon is penuche-esque. And the filling is delicious. I can't imagine eating it straight, though. Too sweet!

Spent grain bread

I chose one of the recipes from my last postSnappy Service Cafe's Homebrewed to Home Baked: Spent Grain Bread.

Spent grains

I didn't have much time, so I heated the water and spent grain for 30 seconds in the microwave, and turned off the Zo's initial rest cycle. During the first knead I checked on the dough; it seemed a bit wet but fairly cohesive, so I didn't add any flour.

The baking bread smelled great, and the final product looked much better than most of my recent bread machine loaves.

A tall, good-looking loaf of bread

I sliced into the bread after it was fully cooled. The end was easy to slice, but the next slice was very uneven; the bread was so soft it was hard to cut. Adding some gluten might help with that.

Good looking inside, too

The taste was great, with a texture that (during the first 24 hours) was on the verge of being too soft. The whole grains kept the texture interesting, though a bit of husk did lodge annoyingly between my teeth.

One bite of the bread had some grit in it. I guess they don't have to be as careful with beer grains (which get filtered) as with grains for consumption. I wonder if the grit would be easy to wash out before brewing. Or maybe this was an anomaly; the rest of the bread was grit free.

The texture of the bread improved (to my taste) after the first day, as the bread dried. The recipe warned that the bread would be too dry after a couple of days, but I didn't notice that problem.

Details:
  • salt -> 1 tsp, yeast -> 1.25 tsp (bread machine yeast)
  • agave syrup -> honey (TJ's multi-floral & clover)
  • bread flour, canola oil
  • 1.25 cups water

Cinnamon bread

I made the same whole-wheat sourdough with "penuche" filling that I'd made before. It turned out less messy this time, though I still think the dough could be wetter and hold together better.

This bread has some holes (see the top and right)

I used the dough setting of the bread machine, using more milk than the recipe called for, and adding yet more milk during kneading. The dough was easier to spread this time, and I got more swirls than before. After I shaped the dough, I put it back in the machine (with mixing blades removed) and used the Homemade 2 cycle, which started (perfectly) at Rise 3.

A bit messy outside

Here's what I did ingredient-wise that was different from usual:
  • 2/3 c whole-wheat starter, 1/3 c white
  • Started with about 1/2 c 1% milk, adding 2 T. I probably could've just used 3/4 cup.
  • For fat, I used 1/2 ghee, and 1/2 extra virgin olive oil.
  • I used more than 1/2 cup walnuts (toasted and chopped fine).

Sunday, October 18, 2015

Baguettes, penuche, walnut sourdough, and rice medley

A couple of weeks ago I made baguettes (with lots of help from my husband) and cinnamon bread (using whole-wheat sourdough and penuche). In the past week I also made walnut sourdough and whole-grain daily bread, using TJ's rice medley as the grain.

Cinnamon bread: whole-wheat sourdough with a penuche filling

Baguettes

I made a recipe similar to what I've done before, starting rather late in the day because I was giving the sourdough starter maximum time to make something of itself. 

I used the dough setting of the Zo to make the dough, removing it shortly after the first knead stopped. I then put it into an oiled 2-gallon measuring cup and left it, covered with plastic wrap, in the kitchen for an hour or more. Then into the fridge it went.

The next morning it was huge, sticking to the plastic wrap. I mostly unstuck it, pushed it down, and put it back into the fridge.

I'd sent email to my guys, asking them to shape and bake the baguettes, and providing thorough instructions. Here's a copy of the text. I was a little nervous because they'd never shaped baguettes before, but I shouldn't have worried. My husband did a great job! He made three baguettes:
  1. Just sesame seeds (no wash or water?)
  2. Plain, with picture-perfect slashes
  3. Egg yolk wash, sesame seeds, pumpkin seeds, and sunflower seeds

The resulting breads were all tasty and crusty, if a bit lightweight. Nonetheless, we'd make them all again.

A couple of notes:
  • I should've pushed down the dough before putting it into the fridge.
  • It survived anyway.

Cinnamon bread

This stuff is delicious. I made it twice, trying to iron out the kinks. I'll be making it again, but this time we'll try to save some of it to (1) avoid gaining weight and (2) freeze for toast and perhaps for bread pudding. 

I'd made the whole wheat sourdough recipe that's the basis of this bread before (Hensperger p. 280), and didn't like it much. But when you add penuche—brown sugar, butter, cinnamon, and (for this recipe, at least) nuts & vanilla—it's so good. The penuche instructions are on p. 281.

First I created the dough in the bread machine. Then I took it out, flattened it, and spread butter on it.


Dough with butter on top

The starter, and thus the dough, was too dry for this recipe, so I couldn't spread out the dough very well. As a result, the penuche mixture was perhaps half an inch thick. (I wasn't about to waste any of it!)

Thick penuche layer

I managed to roll it up.

After rolling

I took out the mixing blades from the bread machine's dough pan, and put the dough back in there to cook.

Shaped loaf ready to bake

The finished loaf looked and tasted very good, but it would've been nice to have less bread between the bits of penuche.

The inside of the baked loaf

So I tried again, a day or two later. The second loaf was misshapen, thanks to me adding the liquid too late for it to really get incorporated.

The ugliest part of the second loaf

Still, adding the liquid allowed me to make the dough thinner, enabling a wider dispersion of the penuche.

Inside the second loaf

Notes for next time:
  • I was confused by Hensperger's instruction to check the dough's consistency during the second kneading. I thought it meant during the start of the 2nd rise cycle, but that's not a kneading, just punching down. Next time, I'll check the consistency when the raisin beeper goes off.
  • I watered down the starter of the second loaf, but it was still too thick. Next time, water it down a little more, perhaps using milk instead of water.
  • The first time I used liquid vanilla, which you're supposed to mix with the butter. It never really mixed. The second time I used powdered vanilla, which was much easier to work with.

And the rest

The walnut sourdough was very good, as usual.

The whole-grain daily bread (from a Hensperger recipe I'd made before, p. 181) was good, but a bit too light for our taste. I also didn't like the occasional hard grains that were in TJ's rice medley, although I love them when I'm eating the rice plain. My husband made a grilled tomato-cheese sandwich with this bread, and it was OMG good, in a "you'll have a heart attack by 60" way.

Saturday, September 26, 2015

Over-the-hill sourdough, spent grain bread, and whiskey-cherry-chocolate ice cream

I was out of town again last weekend, but managed to make a couple of breads and some ice cream.

The first bread was the usual sourdough, but with a starter that was long in the tooth. The second was a bread machine recipe that used the spent grain from my guys' initial attempt at brewing beer. I say attempt because it'll be a month before we know whether they succeeded. Thank goodness bread doesn't take as long.

Sourdough bread


Tired starter produces misshapen yet tasty sourdough

The sourdough was the same Josey Baker recipe I usually use, except:
  • The starter had last been refreshed over 24 hours before, so although it smelled great, it was way past peak activity/volume.
  • I refrigerated the dough after the last "knead" (on Friday), not returning to shape it until Sunday evening, and not cooking it until Tuesday morning.
  • Since it seemed very wet, after shaping it I put it in the fridge with a kitchen towel over it, instead of plastic wrap.
Covered with a kitchen towel, not plastic wrap

I put it in the basket seam side down, meaning not to slash it. However, it was so nice and dry after its rest that I did end up slashing it, and it (for once) cut nicely. I probably shouldn't have slashed it, though, because it might have grown taller without the cut.

Before going into the fridge

Fresh out of the fridge, 2 days later: barely risen, with weird dry spots

The resulting loaf was wide and misshapen, but it still tasted really good. I thought it might be extra sour due to the acetic acid encouraged by extended refrigeration, but it wasn't, probably because the yeast was barely alive and the dough was on the wet side. (See Tips for Manipulating the Sourness of Your Sourdough and "Where does the sour flavor come from?" in King Arthur's guide to sourdough.)

The final result
It looks burned but doesn't taste like it

Spent grain bread

This was a good bread that I will make again, although perhaps with more interesting grains and fats. I used Hensperger's whole-grain daily bread recipe (p. 181), which calls for 3/4 cups cooked whole grains and 2 T canola oil. In addition to the usual salt, yeast, and gluten, the recipe also calls for honey, buttermilk (I used powdered) bread flour, a bit of whole wheat flour, and an even smaller amount of rolled oats.

Spent grain bread

I liked the texture and flavor, but the spent grains didn't seem to add much flavor, and the oil certainly didn't contribute any. Next time I might try farro and olive oil, or perhaps buckwheat and hazelnut oil. So many possibilities. I might also try real buttermilk.


Whiskey-cherry-chocolate ice cream

This ice cream was similar to the version I made before, except I used bourbon instead of rye, candied jarred cherries instead of rye-soaked fresh cherries, whole cherries instead of quartered cherries, and TJ's semi-sweet chocolate chunks instead of whatever I used before.

I also was low on cream, so I used some half-and-half and more milk than the recipe called for. All in all, the fat and alcohol content was lower, and this ice cream wasn't quite as delicious as before—I mostly blame the cherries not being chopped. We also overcooked the eggs, which might have affected the flavor and consistency (although we strained the mix, as usual, so at least it was smooth).

Next time, I want to try this:
  • 3/4 cup whole milk
  • 2/3 cup sugar
  • 1 1/2 cups heavy cream
  • 4 large egg yolks
  • 3 T whiskey
  • 1 cup chocolate chunks
  • ~1 cup quartered candied cherries (TPS p. 185), perhaps with a bit of their syrup
Sorry, no pictures this time.

Sunday, September 13, 2015

Baguettes and two old standbys

I was away this weekend, but the week before I made baguettes again—successfully!—and a couple of bread machine loaves: toasted sesame and Bohemian black bread (BBB). Then for this weekend, I made the toasted sesame bread again.

Toasted sesame bread #1, uneven as usual (but tasty)

The toasted sesame bread seems to always turn out much higher on one side than the other. I thought maybe it was due to my not sprinkling the salt on evenly, but even when I mixed the salt with the water for loaf #2, the loaf was uneven.

Toasted sesame bread #2, still uneven

Now I'm thinking that perhaps the problem is simply that the bread is 100% whole wheat, and (even on the whole wheat cycle) the bread simply tends to clump around one mixing paddle more than the other.

A possible solution might be to check the dough when the raisin/nut beeps sound, to make sure it's even. It's not a big deal, though. The unevenness doesn't affect the taste or texture at all, just the size.

Toasted sesame is becoming my go-to bread. It's 100% whole wheat, it smells great, and it tastes great with everything except sweet toppings. It's great with tuna or pesto, and very good as a PBJ bread, but not so great with butter & jam or butter & cinnamon sugar.

Inside toasted sesame bread

Last week's Bohemian black bread (BBB) was fairly even, but a bit lower in the middle. I think that might be caused by the dough separating into two halves, each one centered on a mixing paddle. BBB has less whole grain than the sesame bread, fwiw.

Bohemian black bread (BBB)

The BBB was much lighter in color this time, since instead of using black cocoa I used Lake Champlain Chocolates cocoa, which is a light reddish brown. I need to get some more of that black cocoa.

The inside of BBB

On to baguettes.

A week ago Thursday and Saturday, I refreshed the white sourdough starter. Saturday morning I refreshed the whole wheat starter. Sunday I made baguettes.

I used a variant of King Arthur Flour's sourdough baguette recipe, ending up with these ingredients (almost identical to the first batch, except I used all-purpose flour + gluten instead of bread flour):
  • 1/2 cup + 2 T lukewarm water
  • 1 cup sourdough starter (I used white only)
  • 2 1/4 cups all-purpose flour
  • 2 tsp gluten
  • 1 t salt
  • 1/2 T bread machine yeast
I forgot the gluten until a couple of minutes into the mixing. Whoops! Canceled the cycle, added the gluten, and started the dough cycle again.


Around 5:45 I took the dough out, shaped it, and put it in the gheed baker (where gheed is to ghee what oiled is to oil).

I wet a dish towel, put it on a cookie sheet, and then awkwardly dipped the top side of each baguette onto the sheet. I put the largest baguette in the middle. I added raw, whole buckwheat to the top baguette.

From top to bottom: buckwheat, biggest, prettiest

I accidentally turned the oven on before putting the baker in. I didn't realize until it was already hot, but I turned it off while the loaves finished rising.

About to go into the oven

I might have overbaked the bread a little bit, but my family and I liked it. It had a nice crust (though perhaps a little thick) and tasty, tender innards. And it didn't stick to the pan, at all!

Buckwheat covered baguette

We started with the buckwheat-covered baguette. A lot of the buckwheat fell off, but that just made it that much more fun for my daughter and me to go on a little treasure hunt of the cutting board.

The buckwheat-covered baguette didn't last long

The next day we had about 1.5 loaves left, which we used for chicken sandwiches. It was so nice to have a real baguette sandwich again! It made me want to find a recipe for banh mi bread, the craptastic bread that makes a terrific holder for delicious Vietnamese fillings. Here are some recipes that I might try:
Back to traditional baguette recipes, I'm thinking about trying some of the following recipes from King Arthur Flour, all but one of which require an overnight rest:

Thursday, September 3, 2015

Baguettes (starring Emile Henry) and onion sourdough

This week: baguettes! (Cue Flight of the Conchords' Foux Du Fafa.) I also made an onion sourdough before the weekend (new for me), mixing the dough Thursday night and shaping it Friday morning before going to work.

The baguette baker

This Emile Henry baguette baker was the last of my birthday presents to arrive. 

From my enabling-in-a-good-way husband

The baker came with a recipe book filled with lies, such as using flour to prevent sticking. Unfortunately, I believed the book the first time I tried making baguettes.

The first batch of baguettes stuck badly

All the baguettes stuck to the pan. One even stuck to the top of the pan, which made removing the top a challenge. When I finally managed to get the top off, most of the stuck loaf's crust tore off.

The biggest loaf stuck to the top

As a result, Saturday night we had pieces of baguette with dinner. Delicious, crusty pieces, but still... pieces.

What we could scrape out of the baguette pan

Lessons for next time:
  • Oil, don't flour, the pan.
  • Be careful about watering the tops of the baguettes.
  • Put the biggest baguette in the center.
  • Always look at King Arthur's site before trying to use equipment they carry.

Baguette trial #1

Here are more details about my first try with the baguette baker.

I looked at four recipes:
  • Hensperger's pain de paris (p. 216)
  • Hensperger's classic baguettes (p. 204)
  • Emile Henry's "The real French baguette"
  • King Arthur's recipe for sourdough baguettes
I ended up using kind of a mix:
  • 1/2 cup + 2 T lukewarm water
  • 1 cup sourdough starter (I used white only)
  • 2 1/4 cups bread flour (most called for all-purpose flour plus gluten, but I had no all-purpose)
  • 1 t salt
  • 1/2 T yeast
The recipe in the Emile Henry book called for just 2 cups of flour (3/4 less than the King Arthur recipe, if you count the half cup in the sourdough starter), so I considered taking out 1/3 of the dough for baking separately. But then I weighed the dough, and it was just over the 600 g that the Emile Henry dough should have weighed, so I decided against removing any.

The dough was quite slack (my new word of the week), but I used a ton of flour on the board, and a dough card as necessary. I managed to shape the baguettes, more or less, although my hands ended up covered in dough.

Shaped and ready to rise

I don't trust my ability to eyeball quantities, so I weighed the dough when dividing it in 3. That was kind of a pain, so I should just try to just eyeball it in the future.

After rising

I decided to slash one baguette, leave one unslashed, and put sesame seeds on one. I brushed all of them with water.

After slashing, splashing, and seeding

Coming out of the oven, they looked nice enough, even though half the top of the slashed one came off.

Fresh out of the oven

The crusts were crunchy, and the insides were delish. If only they had come out of the baker in one piece, I would have called them successful.

A success, if you ignore the fact that the loaves were in many pieces


Baguette trial #2

The next day I tried again, using the King Arthur recipe for sourdough baguettes, sugar and all. I halved it because 3 baguettes is plenty. So, along with the salt/yeast adjustments I always make, that meant:
  • 5/8 cup lukewarm water
  • 1 cup sourdough starter (I mixed my white and wheat starters to get the thick pancake batter consistency it called for)
  • 2 1/4 cups bread flour (I had gotten all-purpose flour in the meantime, but I didn't want to change too much from the last time, so I used bread flour and no additional gluten)
  • 1 teaspoon sugar
  • 1/2 tablespoon bread yeast (not instant yeast)
I put all this into the bread machine and got the dough cycle going. I started 4 pm Sunday afternoon, and started shaping the loaves around 5:30 pm. By 5:50 they were shaped and in the pan. (The kitchen was fairly warm but probably a few degrees cooler than the day before.)

Shaped

I decided to experiment a bit with the toppings, and to forgo slashing. The middle baguette had just canola oil spray; the others had olive oil and seeds (pumpkin or fennel). I feared that oil with toppings was a bad idea, but the egg yolk wash that the recipe recommended sounded like it might stick to the pan.

Ready to go into the oven
Top: olive oil & pumpkin seeds
Middle: canola oil spray
Bottom: olive oil & fennel seeds

I preheated the oven to 475. At 7:15 (perhaps a bit early, but I was out of time) I put loaves into oven, turning it down to 450.

Oil meant no sticking, and less crunch. Boo.

The results were OK but not great. This time, there was no sticking at all, but the crust wasn't as crunchy, and the loaves were flat. The taste was fine, but I don't see any reason to add sugar to the dough.

Next time, I'll oil the pan but water the baguettes. I'll also make sure the baguettes rise long enough.


Onion sourdough

Thursday night I cooked an onion in some olive oil.

Cooked and cooled onion

I then made my usual Josey Baker sourdough loaf, but with the cooled onion added.

The dough just after mixing

I did the usual 4 stretches of the dough. This dough was pretty darned slack, probably because of the olive oil in the onions.

After the final stretch

After less than an hour of rise time, I put the dough into the fridge.

About to go into the refrigerator
The green line is the dough's height just after mixing

When I woke up the next morning, I took the dough out of the refrigerator. The kitchen was pretty warm (81) before I opened the back door, which cooled us off a few degrees.

Fresh out of the fridge

I shaped the bread and put it in the long covered baker.

Shaped and ready to rise again

Almost 3 hours later, I decided it was ready to go.

Ready to slash

My guys took it out of the oven and sent me this pic.

All baked

My husband adored this bread warm. It was fine once cool, too, but when it was warm you could really smell and taste the onion.

A slice of onion sourdough

Details:
  • 9.5 oz onion
  • Thursday night:
    • 20:25 mix all done
    • 21:05 stretch #1
    • 21:25 stretch #2
    • 21:45 stretch #3
    • 22:05 stretch #4
    • 22:50 into the fridge
  • Friday morning:
    • 6:15 took out of fridge, let rest a bit, started to shape
    • 6:35 shaping complete; resting in baker
    • 9:18 slashed (badly) and put into oven, which I then turned on to 425 degrees
    • After the oven got to 425, I set a timer for 30 minutes and left for work.
    • My peeps took off the lid at 30 minutes, and then left it in the oven to brown for a few minutes more.